
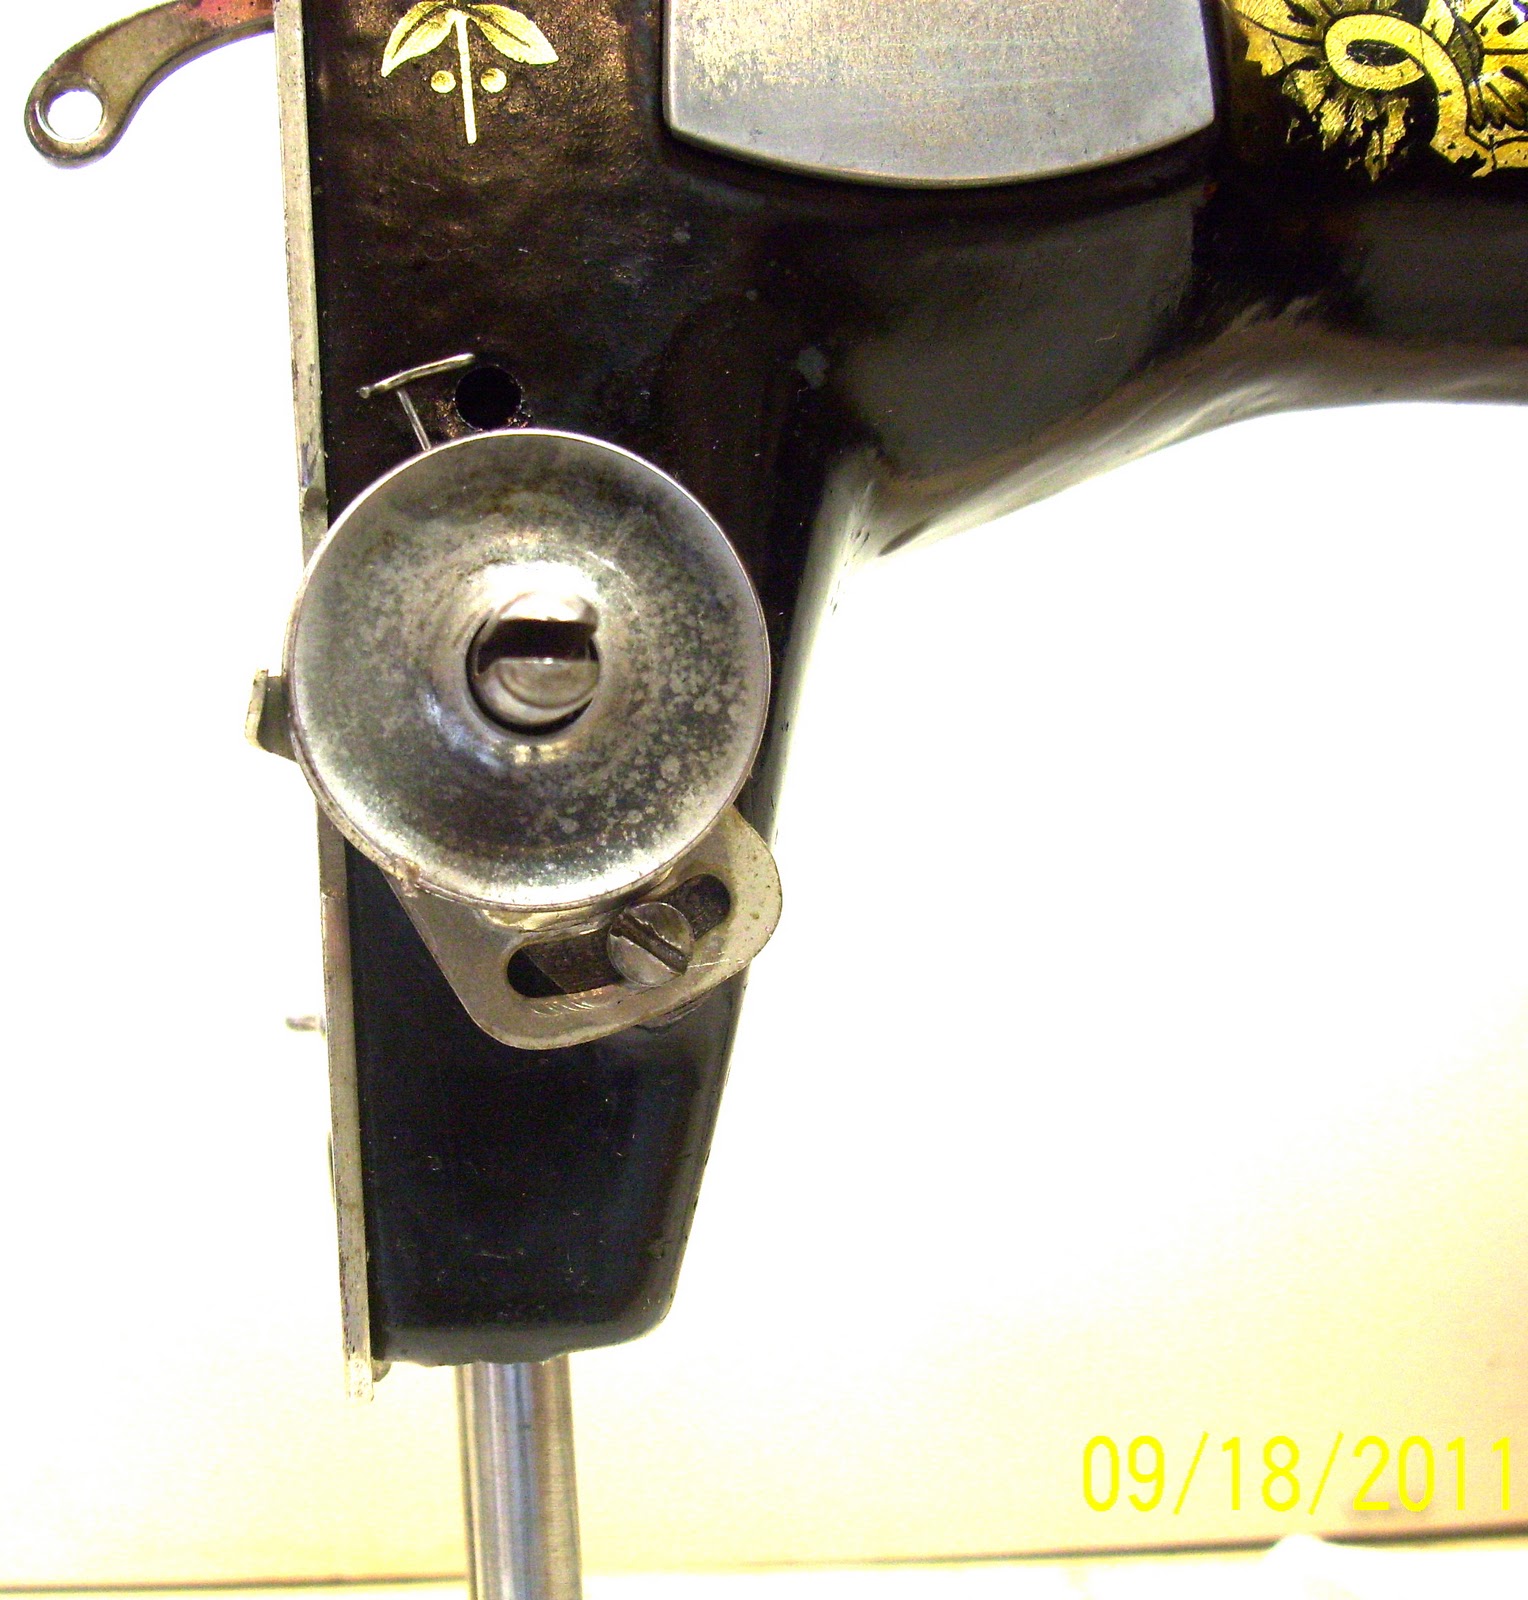
This piece is the equivalent of the set screw on the 66, I believe.

Check spring I n this photo you can see that the check spring is sitting under the thread guide. You want the check spring to be positioned between the two indentations on the opening in the machine

More like this.

I could not exactly remember so today (1/31/12) I got the machine out and took it apart again and figured out what I did.
I took the stud and the check spring out and looked at them. I noticed that the check spring has a smaller loop at its proximal end (the end that is nearest the body of the machine) That small loop needs to sit on the proximal end of the stud so that when the stud is tightened the spring is held fast and able to bounce in between the two indentations as seen above.


Inevitably as I tightened the stud, the check spring would tighten in the same direction and end up wrong wrong wrong. So I fiddled. I loosened the stud and pulled on the check spring very gently:

The next photos are from the original post. I can't change them at this point.
The tension discs are placed so that the convex sides face each other. I tried to get a good shot of them.......Not in focus, I apologize.

Tension discs in place. They are clean, just stained. (Sort of like my fingernails)

Next comes the tension spring.


Here you can see how the check spring should be positioned at about nine thirty. It must be correct because the stitches are just so nice. I just fiddled with it (see above) and the stud until it looked like the tension assembly on my 27.

This post has been updated from the original on January 31, 2012 thanks to a question from Carol from vintagesingers yahoo group. I appreciate her question because it makes this post much more complete. I also had a chance to fool around, some more, with Adobe Photoshop Elements 10. Software that came with no manual. Jeez.
thanks so much for posting these GREAT pictures on a tension reassembly! It makes a world of difference to those of us newbies who have a hard time trying to visualize written technical instructions. I LOVE finding these beautiful old ladies, and showering them with a bit of TLC to bring them back to life. Thereby continuing to provide someone with many more years of happy sewing!
ReplyDeleteJust a note of thanks from an old gal with two Singer 128's that both need tension cleaning. I can follow written instructions pretty well but it's so nice to have pictures to go along with the words!! Thank you!
ReplyDeleteKath in Southern Ontario...Canada eh!
Could you advise me where I can buy a tension spring in the UK for Singer 28?
ReplyDeleteThank you SV
Helen Howes has a wonderful website and is in the UK. I bought my check spring for my 28k from her - http://www.helenhowes-sewingmachines.co.uk/ - she will also give you advice if you need it :0)
DeleteI have no idea where you can find such a spring in the UK if you are a member of the yahoo groups Vintagesingers or Wefixit I know there are several members who live in the UK. Perhaps they can help you
ReplyDeleteElizabeth
For the curious,,,I have a 100 year old model 27 that has the EXACT same tension assembly,,,so the tension spring or other parts "may" be found if you look at other models. Hope this helps. :)
ReplyDeleteThis a fabulous explanation of an old tension (dis)assembly. My spring was broke off and I wanted to fix it (determined newbie that I am) and I DID IT!!! with your explanation. Many thanks and happy restoring.
ReplyDeleteI have a cleaned up Singer 27 with what I suspect is a tension assembly problem. The tension spring hook was more of a u that was bent back, the discs did not stick, the machine, needle and bobbin were threaded and loaded properly (by manual and video). The problem is everytime I try to sew the thread bunches up between the needle and the assembly, the thread comes out of the spring hook and ends up against the machine and the thread comes out of the needle or breaks. I've even tried adjusting the spring stop plate? and the tension from one extreme to the other and spool does not move regardless of anything I do. I suspect the spring was stretched (now I know it is but after 6 hrs without a single stitch patience wears thin). Just praying replacing the spring will fix the problem. Thanks for any help.
ReplyDeleteThank you for the tutorial. I had to replace the check spring on my 27 this morning. With your pictures and explanations as a guide, it was a breeze.
ReplyDeleteThis tension reassembly helped me put it back together on my 28K. Now having trouble getting the bobbin winder assembly adjusted. The big front screw is too lose. I can't tighten it because the little nut on the back moves and o don't have a wrench that small. Could the whole wonder be taken off and cleaned and the nut tightened while it's off?
ReplyDeleteYou certainly can take the whole assembly off. I do, however, suggest that you work the proper tools and if you don't have a wrench that small, doy our best to procure one.
DeleteI have googled and YouTube to learn how to replace the upper tension assembly on a singer 31 15......please help
ReplyDeleteLook for a set screw that is holding the assembly in place.
DeleteThank you
ReplyDeleteThank a lot!!! It´s very usefull!!
ReplyDeleteThis was very helpful! Thank you for a detailed explanation. The photos illustrated the process perfectly.
ReplyDelete