Showing posts with label potted motor. Show all posts

Wednesday, January 16, 2013

Bobbin Winder Switch

 It was about four o'clock today when I finally had a chance to stitch test the last 201-2.  I had spent the earlier part of the afternoon building a base to display it, and the others, in a photo shoot.  Steven trimmed the tongue from some oak flooring for me and I was thrilled to have some really fine material for the base.  But it was too narrow and would not fit.

By then I was left to my own devices and found some other scrap flooring (fir, I believe) that had already been tongue trimmed.  I happily cut my pieces and, using my fancy new  Christmas present


Screwed and GLUED the pieces together.

Actually this was the second attempt.  The first attempt ended up in the kindling box.  I was going to live with the mistakes, but Steven told me to just start over.

"It's kindling.  It's ok."

I decided he was right. 

Pretty pleased with myself at how quickly this went together, I tried it out.  Too Big.

"Better that, than the other way," Mr. Professional Builder said as I exclaimed my disgust with myself. "You can take it apart."

"I GLUED it too."  I said as I backed the screws off one side of the base.

"Oh.  And that stuff really holds."

I got my hammer and whacked it.  Pop, off came the side.

"Do I have to take it  all the way apart or can I cut it on the chop saw like this?" Batting my eyes at the professional.

"I can do it for you."
And with that he trimmed the excess off of the ends and I drilled new pilot holes with my fancy new Bosch and screwed it back together.
When I first started making these bases, I would chisel out notches for the hinge holes.  Not now.  I just add that little piece to support the back in between the hinges.  Much quicker and neater.  Quicker if you remember to measure twice, cut once.  Note the counter sink on the screws.  I filled them in with wood putty after I sanded it.  Once the filler is dry I can paint it.

So, finally, at Four PM I was ready to stitch test this machine.

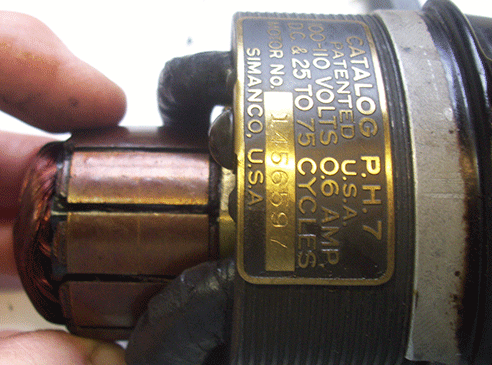
I have to say I was nervous.  This machine had been a parts machine, in a way.  I used its position bracket for the Centennial this summer.  Then I scammed its bobbin case for the miscreant 201 that was not stitching properly.  I also switched out tension assemblies.  I wasn't really sure it would sew.  The motor sounded good but who knew how it would stitch?

I do like to check the bobbin winder when I stitch test a machine.  I figure if the BW doesn't work, the machine isn't worth much.

The bobbin would not fit.  That's not exactly true.  The bobbin fit, but the guide that fits inside the bobbin as it winds, was too big.  Look.

 You can see that it is too big for a class 66 bobbin, right?  Guess what fits on there just perfectly?  A class 15 bobbin.  I was muttering to myself, thinking, "How on earth did he (I had bought the machine from a man, so I knew) ever wind a bobbin?  Did he know it was like this when he sold it to me?  What a chump I was.  "

Then it dawned on me.  I had taken this motor from a 15-91 parts machine and never changed the bobbin winder.  I wasn't a chump, I was a moron.

"Well, good, I can change the BW from the lost cause motor.  I hope."

Wrigley was sleeping on his bed in the shop as I said this.  I wasn't REALLY talking to myself.  Steven was in the shop, too, but could not hear me for all the noise of his power tools.

I got the Lost Cause Motor and looked.

"OK.  I have to loosen two screws and pay attention to how that spring fits under the motor housing.  Should be easy."


I did the one on the machine first.  No problems there.  Clever me, I even left the spring in its housing on the machine. 
I put the 201 guide back on the machine, but it had no spring, despite being attached to the spring in the housing.
Of course, I discovered this AFTER I had screwed it back on.

I removed it and the spring fell out.  It was broken.
"Well, no wonder." Had I been less clever, I would have known this earlier. 

I found the remaining part in the housing and pushed it out through the hole on the other side.

You can barely see it in this photo, sorry, in a hurry.

I took the intact spring and placed it inside its housing, making sure that one tab fit in that little hole.

When you are replacing the guide, be careful to keep every thing lined up and don't let that spring fly across the room. Be sure that the screw is seated correctly or the guide won't spring back as it should.  if it doesn't, just loosen the screw a bit and reposition it.  It will seat itself if allowed.   It is no where near as tricky as replacing the analogous spring on a Singer 66 BW.  Actually it was pretty easy.

 All that was left was to place the other piece in position and tighten it in place making sure the spring was hitched under the housing and the two pieces articulated correctly. That was easy enough because I never removed the screw from its housing and thus, did not change the spring's position.

 So finally I wound the bobbin and was able to stitch.

I like this machine. It makes a very nice stitch.  See?
OK now that makes the seventh 201-2 I have serviced and "rescued."

I think one of the reasons Steven is so complacent about my "habit" is because he realizes that all the sewing machines could, just as easily, be dogs.


Sunday, January 13, 2013

They All Look Alike

I had been having a love affair with the 201-2.  I love its sleek body, the quiet motor, the perfect stitch.  I have serviced seven as of today and, honestly, that is enough.

It is reportedly the best sewing machine that Singer ever made.  I believe it.  Every one of the machines that I serviced stitched beautifully as soon as I stitch tested it.  Now I did have an issue with "my" 201. The one that I decided was mine because it was the first motor I had ever re-wired.  It also is my logo.   It was sewing nicely then started to sew very poorly.  All of a sudden.  It was dirty.

That was the one with the stuck feed dog lifter roller.  Before I discovered the problem with the roller, I pulled the hook and found some dirty lint here:
Singer 201-2 hook
It is sewing much more nicely now and I hope that is what was wrong.  We shall see as soon as I try to use it and really test it. (This photo is of Lazarus's hook.  It had a burr on it and I wanted to see if I could depict it photographically.  I can see that the hook looks rough,

here is a better photo...


 I sanded it down can you see the difference?

This final 201-2 to be serviced has been sitting around since summer of 2011.   It came with a #42 cabinet. I was still pretty naive then.  I was also pretty obsessed and reading Craigs List like it was Fifty Shades of Gray.    I was so thrilled to have found this one, in a #42 cabinet no less.  The asking price was 100 bucks.  I pointed out the need for a complete re-wire and offered much less.  He accepted.  Lucky me.

 That same day I bought another, in a Queen Anne cabinet.  It wasn't that much further to drive, maybe only another hour.   I spent the whole day on the road chasing 201s.  I did some self-flagellating on the way to pick up the second machine.  I was rewarded, though, because this one looked pretty good.  The wires were intact and it ran nicely. Cosmetically it looked good.

I rationalized it on the 130 mile trip home from Granville, NY

"This one has good wires," I told myself.  "I can use it as a model so that I can re-wire the others and then I will have three really good machines.  I can keep one and sell the other two to pay for gas."

Turns out, the one I thought was a good one, the one I chased all the way to the Vermont border,  had a truly foul  re-wire job.
http://mysewingmachineobsession.blogspot.com/2011/12/another-201.html
Today's had a very icky light switch and lamp connection.http://mysewingmachineobsession.blogspot.com/2012/07/theres-light.html

I had toyed with the idea of re-wiring the light.  I took another look today and decided that I could cheat and crimp on a new connector and add some shrink insulation and call it good.

What I did not understand was how to connect the switch to the light.  I knew I had taken photos. I had even written a very descriptive and detailed post about it.   I just was too lazy to leave the shop and look for the pictures on the computer.    I did figure it out.  The ring connector on one of the wires was too small for  Mr. Three Pin Terminal.  It would only fit on the light switch. Sort of a no brainer when you think about it.

  Nice and tidy, eh?
Now, that is not the original Mr. TPT.  I had bought some 201-2 parts I found on eBay.  I am so glad that I did.  It was worth the money not to have to clean out that mess today.  I will clean it all up eventually and keep the switch as well.  I might need it one day.  You never know.

And look, it works !
It didn't at first.......no bulb.  I am such a genius.

For a while I had a couple of 201s in process at the same time. For a long while from the looks of it.   I think the original motor for this machine went with the Granville, NY machine which I sold. It was cosmetically much prettier.   It doesn't really matter, I guess.  But it's just a sign that it is time to get rid of some machines. Or not to have more than one machine apart at a time.

I scammed a motor from a parts 15-91 and I contemplated re-wiring the motor leads.  I took another look and decided that the wires were intact and safe.  I did put new shrink insulation over them, soldered on new connectors and was good to go.
The brushes were adequate.  I like to put new brushes in when I service a motor but I am plumb out.  I did replace the grease wicks.  The motor sounds great.  BUT the clutch knob did not screw on all the way.  It was dirty, dirty,  dirty and would not tighten far enough.  Twenty minutes and three hungry dogs later, I had it all cleaned up and working beautifully.

I have yet to stitch test it. Perhaps on Wednesday.  I would like to set up all four of the 201-2s that I have for sale, each in a cabinet.  What a pretty site that would be.
Singer 201-2 1941
I doubt I would pick up another 201-2 on speculation.  I have four now that need to go.  If one landed in my lap I would take it but my days of driving 260 miles round trip (it was really only an extra one hundred miles that day) to fetch this model are over. 

Thursday, October 25, 2012

How to re-install the worm in a potted motor

If you haven't already, check out The Vintage Singer Sewing Machine Blog.  (http://vssmb.blogspot.com/)  Rain has a very detailed tutorial on how to re-wire a potted motor.  I used it again this week as I was working the the Pittsburgh 201-2.

One thing that I do differently.  When I am putting the armature back in the motor and lining up the worm, I take out the screw in the end of the motor.

This allows me to place a small screw driver into the motor housing

I pull the screwdriver out far enough to allow the worm to fit in its home and then I slip the screw driver into the worm to hold it in place.

Then I slip the armature in and pull the screw driver back a bit to allow room for the shaft of the armature.  It works like a charm.  It is much easier than trying to hold the worm in place with a pair of tweeezers.  Once the armature is all lined up, I pull the driver out and replace the screw.


It is important to line the set screws up correctly when re-installing the worm.  I completely removed one of the set screws in the worm when I took the motor apart.  It just happened to be the one on the flat.  The flat on the armature shaft matches the flat on the armature. 
When you are reinstalling the worm, you can't see the flat.  But if you turn the armature and with your third eye, watch where the flat is in relation the to shaft, you can get a good idea where the flat should be. 

Easy Peasy.

Thursday, April 5, 2012

Anatomy of a 201/15-91 potted motor

 Sometimes we can get confused by terminology.  I am posting this so that anyone who needs to understand electric motor terminology can have actual photos to look at and understand.  I learned by doing.

This is what a 201 motor looks like once it has been removed from the machine.
 Remove the housing by unscrewing the little screws and gently wiggle it away from the motor.  Be careful.
Then you get this
The field coil is also known as the field magnet.  If you pick the motor up now and look at the inside you will see this:

The copper windings are part of the armature also known as the rotor.   The armature comes out of the field coil and housing of the motor by loosening  set screws in the worm.


 Then the armature comes out

And it looks like this.  This is a cleaned up version with the worm reattached for safe keeping'  you can see the windings are a bit stained.  Oh well.  Also this armature had been varnished, I guess at the factory,  and that brown glaze won't come off with cleaning. 
When you look into the housing at the field coil it looks like this.To remove the field coil from the housing you have to remove the screws on each side.

If the motor leads were good, you would not need to remove the field coil (magnet) from the rest of the housing.  I don't do this on a good motor.  But this one, well, it needs new motor leads  from the field coil windings to the three pin male connector.    So I took the field coil out being very careful not to detach the brush leads from their connections
Once the field coil has been removed from the housing it looks like this


 If you were to gently pick this up and turn it around you would see this.
 The grease wicks and brushes are removed to service the motor as well.  

I managed to break the brush cover on this machine.  It is bakelite and can be brittle.  I don't know why it shattered but it did.  I had to drill a new slot in it so that I could get it off.  Luckily I had another. 
 Brushes are carbon rectangles attached to springs.  They glide into brush tubes and rest on the commutator

There is a very comprehensive tutorial on how to re-wire a potted motor on The Vintage Singer Sewing Machine Blog http://vssmb.blogspot.com/    Go there  for all you need to know.

Stay tuned here for more fun with Kenmores