Showing posts with label singer 66 cleaning. Show all posts

Tuesday, September 13, 2011

How to service and clean a Singer 66 ..Cleaning the machine

Cleaning the machine itself
 I distract myself from the task of removing and cleaning parts bytaking little breaks to clean the machine.  This 66 is in wonderful shape but she is over 80 years old and dirt does accumulate.  I have used various methods of cleaning but my favorite is still castile soap.  I used Murphy's (or a generic equivalent) on Rosie and some of the decals were damaged a bit.  I think the castile soap (Dr. Bronners almond oil) is gentler.  

I work in a small area at a time and I use q tips on the decals to gently wash the dirt and grime away.  I buy the cheap q tips and refuse to by the Q tip brand name for this task.  They just come apart.  Generic q-tips on the paper stick work the best.   I go through a lot of q tips because once it get black I toss it.   I use a toothbrush on the decal free areas.  I then gently wipe the  machine clean with a clean rag (old   tee shirts.  I have a lot of them.  ) I like to follow that with a rinse of sewing machine oil (applied with a q tip)  and then I keep gently rubbing.  I have experimented with bug and tar remover as well.  I also have used TR-3 resin glaze cleaner and polish but not until I have removed most of the grit and grime.  I don't use it on the decals, though.  I just rub and rub gently gently to get it shiny.     This machine will not look as good as new, nor do I want her too.  I love looking at the marks and scratches and imagine the story of how they came to be there. 


I love the way the colors emerge and the machine comes to life.  This is why I cannot resist taking a break from cleaning parts by cleaning the machine.


In  way I like the contrast all that dirt provided.  The plate itself felt gritty though and unpleasant to handle.   I soaked this part in degreaser first then rinsed with alcohol then used Mother's metal cleaner.  Nothing shines like Mother's.  What is missing in this photo?

 If you said the bobbin winder, you are right.

 The bobbin winder is a chore to clean and to put back together.  I took a short cut and gently cleaned it with some kerosene and scrubbed the metal parts with a small brass wire brush.  I have taken these apart and there is a trick to getting it back together so that the spring works correctly.  I don't like to do it and since I am not a purist, I do my best.  This one cleaned up fairly well with a bit of attention

Sorry, no after photo.  


Monday, September 12, 2011

How to service and clean a Singer 66..presser bar again

Replacing the presser bar, washer, spring and presser regulator thumb screw.
All of these parts go together like this:


I put the foot on just to make it look complete.  You, obviously, must remove the foot before you can replace the presser bar.


The presser bar position bracket  must be placed first.   I have replaced the tension release lever and its spring as well as the presser bar lifter lever.  I love clean sewing machine parts.


The bar passes through the washer the spring and then the bracket.   You can then replace the presser bar thumb screw
What is missing in this photo?
We must get the position and height  of the  of the presser bar right.   
  With the presser bar in the up position there must be a clearance of 5/16 inch between the foot and the needle plate and with the presser bar down the foot must be parallel to the feed dogs.  Adjust accordingly and tighten the set screw.

(The adjuster's manual is in the Files of the We Fix It Yahoo group. )

I always forget to put the thread cutter back on so I always have to take the foot off and put the thread cutter back.

You can replace the slide plate before or after this step.  It doesn't really matter.


Tip the end of the slide plate up nearest the feed dogs as you slide the plate onto the spring.  It will "home" right in when it catches.  Voila.


Good night

How to service and clean a Singer 66..bobbin case again

 Replacing Bobbin case position bracket and bobbin case

Now that the hook is timed we can replace the Oscillating Hook bobbin case position bracket  and oscillating hook bobbin case ((heretofore known as the position bracket and bobbin case )

When cleaning the position bracket I just clean it with rubbing alcohol and try my best to get all the nooks and crannies clean.  I also want to keep that wick as intact as possible.  In my experience (limited to 11 months, I might add) these wicks are pretty shot, if not absent. When Mary and I cleaned her 99k over Labor day weekend I was shocked to see how large it really is supposed to be.
 Now I am on the hunt for some suitable alternative.  Someone on one of the forums suggested using the felt from a spent highlighter pen.  Not a bad idea.


When replacing position bracket the don’t forget to loosen its set screw seen in this photo.  If you don’t you might not get the position bracket completely seated on the hook. 

 Tighten the set screw. When seated properly you should be able to lift the finger up and out of the grove and rotate the position bracket to the right


With the position bracket finger lifted up and to the right   the bobbin case slips in pretty easily.  I admit that I have to fiddle with it to get it to go in but all of a sudden it just slides in.  I am sure there is a trick to it.  Don’t forget to slide the finger back into its groove after you seat the bobbin case.
I did not touch that screw, I promise.

 We can replace the feed dogs now.  Screw them back into place but don’t tighten the screw completely.  We will need to adjust the height later, after we replace the  needle plate.


I was advised that the height of the feed dogs should be flush with a dime when placed next to them on the needle plate.  It seems to work so I continue to use that as my gauge.  I lost my dine, so no photos today.  Adjust the feed dogs to the proper height and tighten the feed dog screw.

Next.... replacing the presser bar.


Sunday, September 11, 2011

How to service and clean a Singer 66..timing the hook

Once the hook is back in the machine, it is time to time the needle and the hook.  The adjuster's manual gives great instructions for how to do this.  It can be found in the files section of the yahoo group We Fix It.  It is also easier to do this with the presser bar out of the way because it is easier to see the needle and the hook.  You can see that I did not time the machine before I put the presser bar back in.
Timing marks
Timing gauge


Place a fresh, unused needle in the machine.  Turn the handwheel toward you so that the needle is in DROP DEAD CENTER.  At this position the top timing mark should be at the top of the timing gauge. 

Turn the handwheel toward you until the bottom timing mark is at the top of the timing gauge. 


At this point, if the machine is timed correctly, the hook should be just behind the needle.


If the hook is not in proper position, rotate it so that it is.  This is why we left the screw loose in the OHS (Oscillating Horizontal Shuttle ) crank.  Once you have the hook directly behind the needle with the timing mark in the proper place on the gauge, tighten the screw in the OHS crank

I do tend to do this with the machine on its side so that I have the best access to the screw in the OHS crank.
This process does take patience and it does require very minute adjustments.  Keep the screw loose enough so that you can rotate the hook, but not so loose that it requires a lot of effort to tighten it.  If you jostle it too much you could disturb your position of the hook and the needle.  It might take multiple tries but I manage to do it and I am not a professional (sewing machine mechanic, that is)


So that's timing the hook of a Singer 66.


How to service and clean a Singer 66..the hook again

Replacing the hook
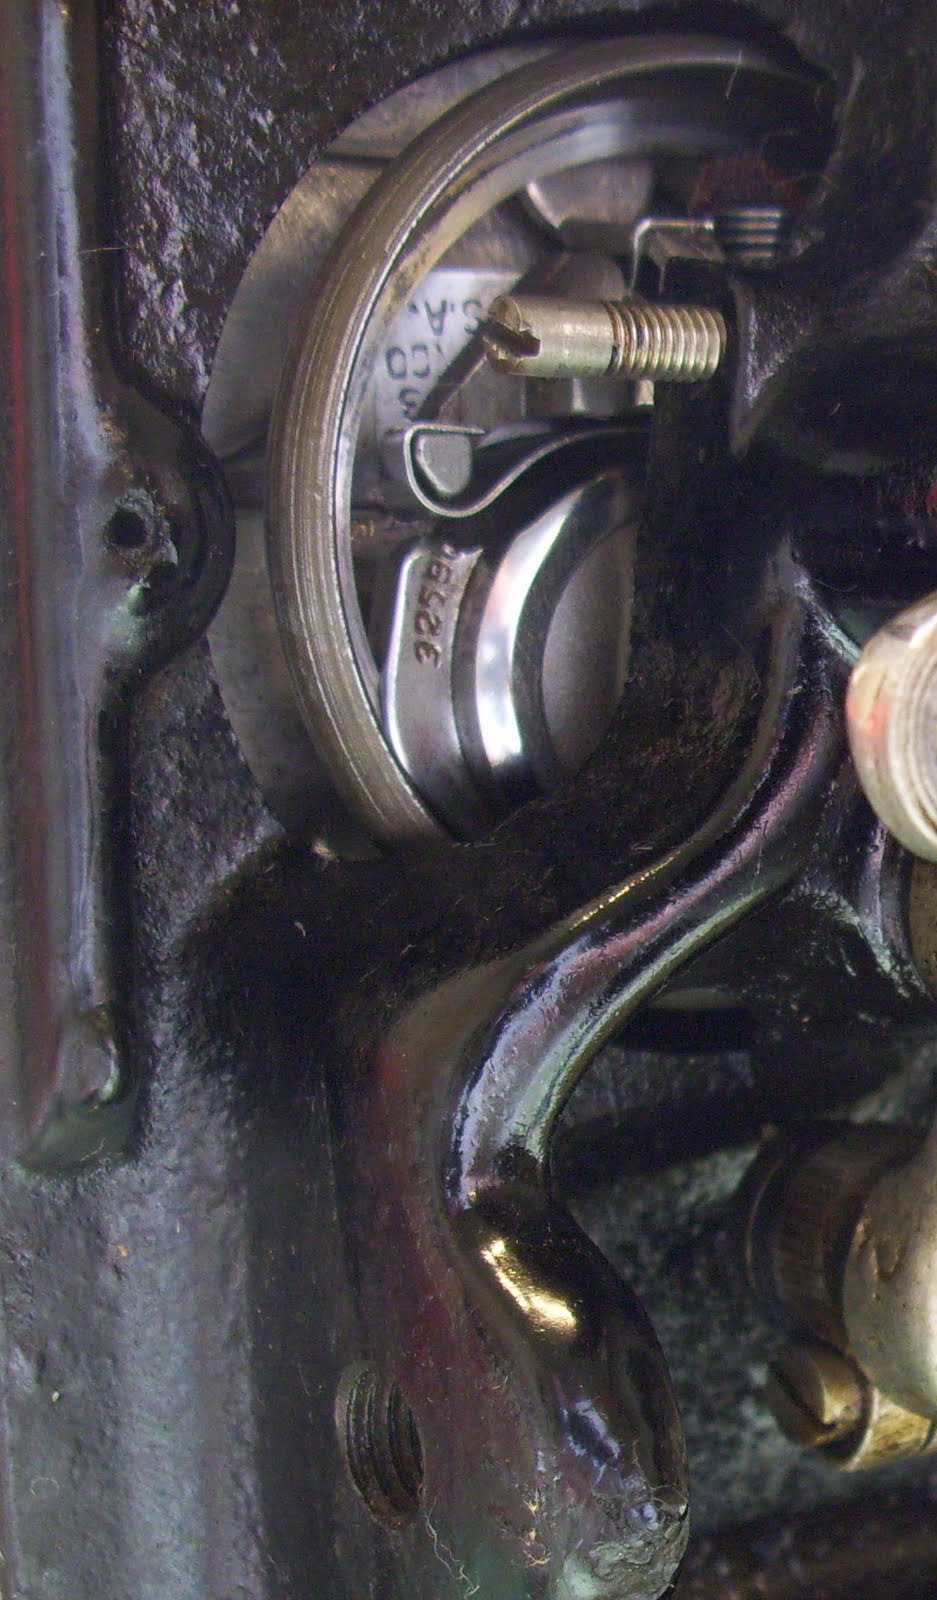
Replacing the hook is easy.  Simply place it back into the shaft from where it came and secure it at the base of this shaft with the oscillating hook crank and its screw.  The pencil indicates the screw which is attached to the OH crank.  You can see that the bottom of the hook shank is seated all the way into the crank.  That is important. Otherwise the hook will sit up too high at the top of the machine. (You can also see that the bobbin case and the bobbin case position bracket have been replaced.  That can only mean one thing, this machine has been re-timed already. I realized that I had put the hook back before I took photos so I just took a few things off for the purpose of demonstration )
 At this point I do not tighten the screw completely.  I want the hook to be able to rotate easily.  We will time it with the needle later.  I HAVE BEEN ADVISED TO WARN INEXPERIENCED SEWING MACHINE MECHANICS THAT THIS MAY BE TOO COMPLICATED TO DO.  However, if you did not heed my earlier warning, better follow closely.  I actually think it is pretty straight forward.  I had all of three months experience with meching on a sewing machine when I did this for the first time.  And that machine had no timing marks.  I guess I did not know it was supposed to be so hard.  

 Next place the oscillating hook connecting link on the stud of the OH crank.
And tighten the screw. 


Replacing Feed raising bar rollers


Here the pencil points to where the roller on the feed raising bar fits.  The forked portion of this piece fits over the other roller.  


Like this:

Line it up and replace its screw and tighten.  Note the very professional looking screw driver.  I love my Brownell Bits and driver.  Thank you, Rain!!!


Now everything is back where it belongs underneath.  Oil the oil ports ath this time.  Just one drop will do.

Next, chapter we will put the presser bar and all its associated parts back. 

Saturday, September 10, 2011

How to service and clean a Singer 66..tension assembly

 Taking the tension assembly a part is often unnecessary.  All the experts will tell you this.  I still tend to do it.  I like getting these parts really clean and I don’t find it all that difficult.  Especially on these old  machines.  I have not taken the tension apart on the 401A   nor any of my 301s.  I have cleaned and disassembled many numbered straight stitch Singer tension assemblies.  I found great instructions on the Yahoo groups.

TENSION ASSEMBLY
 
 That gooey looking hole just to the right of the tension assembly is a set screw, believe it or not.  You definitely do not want to bugger this one up.  I squirted some LW in there and let it sit for a long time before I even attempted to loosen it.  I even took extra care to determine EXACTLY which bit fit perfectly in that screw.  Ever so carefully I loosened it.  I did take it out to clean but I put it right back before I lost it.  Whew.  Imagine trying to find that tiny thing on the floor of my shop. 
Next, I loosened the thumb nut and removed it.  I took this photo to show the individual parts of the tension assembly