Sometimes we can get confused by terminology. I am posting this so that anyone who needs to understand electric motor terminology can have actual photos to look at and understand. I learned by doing.
This is what a 201 motor looks like once it has been removed from the machine.
Remove the housing by unscrewing the little screws and gently wiggle it away from the motor. Be careful.
Then you get this
The field coil is also known as the field magnet. If you pick the motor up now and look at the inside you will see this:
The copper windings are part of the armature also known as the rotor. The armature comes out of the field coil and housing of the motor by loosening set screws in the worm.
Then the armature comes out
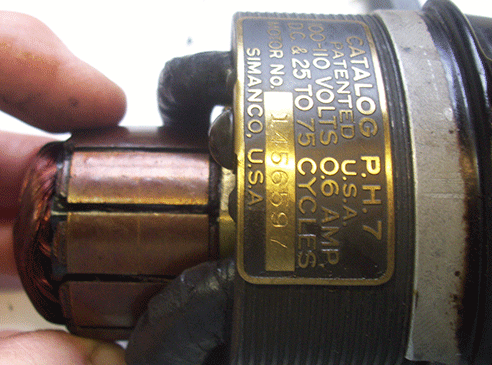
And it looks like this. This is a cleaned up version with the worm reattached for safe keeping' you can see the windings are a bit stained. Oh well. Also this armature had been varnished, I guess at the factory, and that brown glaze won't come off with cleaning.
When you look into the housing at the field coil it looks like this.To remove the field coil from the housing you have to remove the screws on each side.
If the motor leads were good, you would not need to remove the field coil (magnet) from the rest of the housing. I don't do this on a good motor. But this one, well, it needs new motor leads from the field coil windings to the three pin male connector. So I took the field coil out being very careful not to detach the brush leads from their connections
Once the field coil has been removed from the housing it looks like this
If you were to gently pick this up and turn it around you would see this.
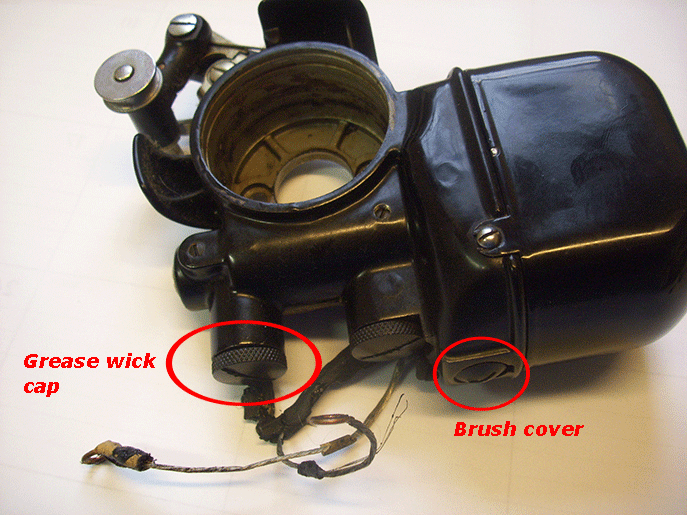
The grease wicks and brushes are removed to service the motor as well.
I managed to break the brush cover on this machine. It is bakelite and can be brittle. I don't know why it shattered but it did. I had to drill a new slot in it so that I could get it off. Luckily I had another.
Brushes are carbon rectangles attached to springs. They glide into brush tubes and rest on the commutator
There is a very comprehensive tutorial on how to re-wire a potted motor on The Vintage Singer Sewing Machine Blog
http://vssmb.blogspot.com/ Go there for all you need to know.
Stay tuned here for more fun with Kenmores


Hi Elizabeth,
ReplyDeleteThank-you for directing me here from Vintage Singer Group. This is so helpful. Without the words, I felt powerless to compose an intelligent question on VSG. Knowledge is power!
Claire (in Boston)
Glad to help
DeleteI. Love. Your. Blog. That is all.
ReplyDeleteThis is awesome, Elizabeth!
ReplyDelete- Rain
Thanks Rain
DeleteVery educational, Elizabeth. You and Rain have it covered. When I get my 201, I'll know exactly what to do. Thanks.
ReplyDeleteLillian
Awesome pics!! thank you
ReplyDeleteReally good visuals which help a lot!
ReplyDelete