Wednesday, April 30, 2014

LEARNING CURVE

I know that I can do it.  I have done it in the past.  I am sure that some how I will figure it out.  Don't give up.  Pups, I think I am de-compensating.  BWWAAAHAHAHAHA. (Yes, I did break down.  But it was dry crying).

I am climbing the machine quilting learning curve.  

I have quilted one queen size quilt and a throw on a smaller Grace Machine Quilt Frame.  I sold it last summer.  That was a good thing.  I don't need two frames.  I bought a larger frame, The GMQ-Pro, four years ago just before I bought the Bailey.    Both frames are made by The Grace Company right here in the wonderful US of A.  I paid full price for the smaller frame 11 years ago.  I used it several times.  It worked well, though required many steps. I quilted a queen sized quilt on it and had to turn the quilt mid way.  I hated that.   I used three different machines on it; the Viking 6440, a White Jeans Machine and, my fave, the Singer 66.   Turning the quilt mid way was a PITA,  so I bought the larger frame; the GMQ-Pro.  Lucky me I found it used in New Jersey.  I upgraded to the Professional Carriage and was ready.  Then SMAD hit.  You know the story...
 
Despite getting the machine set up on the frame and the carriage,

 I was unhappy with the results.  The machine bounced and I jammed the needle more than once.   Plus it is very difficult to thread the machine.  Those handles have it all bound up!

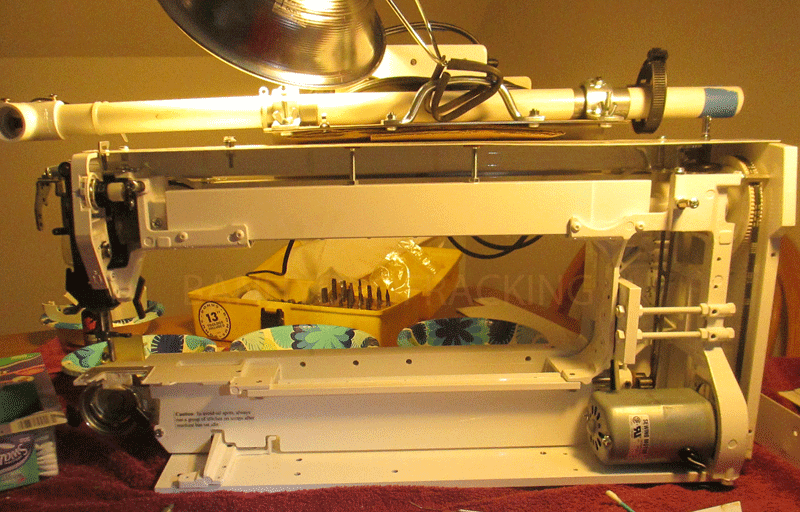
I took the machine off the carriage.  There is a bit of a warp to the top carriage.  Lucky for me I kept the original wooden one.  I dug it out and spent the morning setting it up.  It took me a while to locate the parts.  There are some wooden handles that attach to the carriage but I couldn't find them (I did fined them later, hanging on the wall).  I was able to find the PVC handles that attach to the Bailey itself and just decided to give them a whirl.  I had rejected them originally because I thought there was too much flex to control the machine correctly.  NOT SO.  Worked great. Plus, the set up looks neater without those imposing handles.  True I don't have the extra light but the cord was yet another wire to get in the way. 

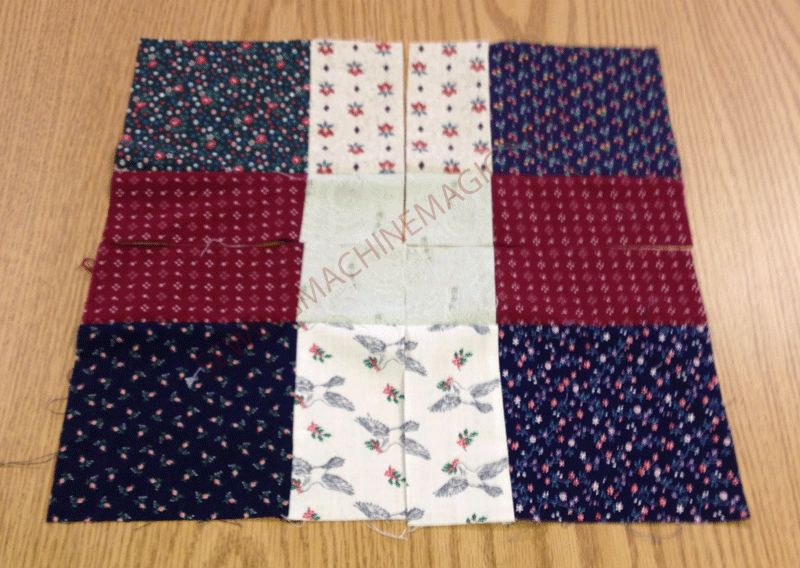
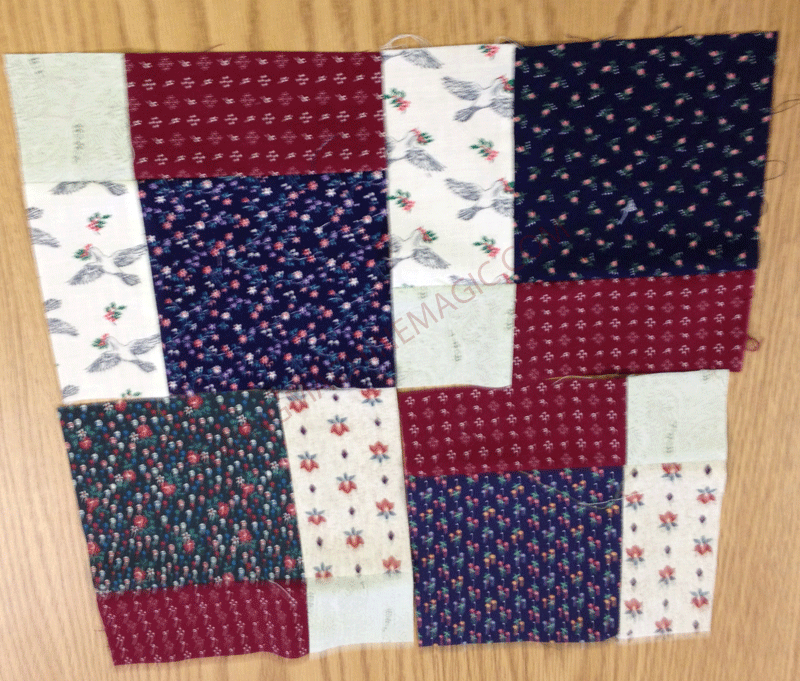
I managed to get some decent stitches with the meandering pattern that I have used in the past.  I want to develope other skills, though.  Pantographs and flowers.  Meandering is a bit boring.

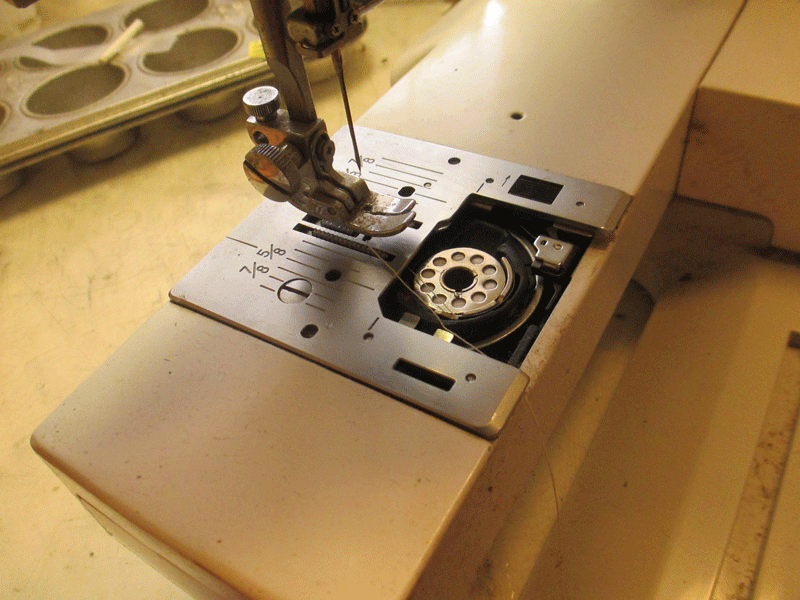
See those ghost holes in there?  That results from running the machine with no thread.  Practice.  The Sew Control is working pretty well here.  This device keeps the stitch length the same, despite how fast I move the machine.  I had to re-install it on the wooden carriage
There are two sensors.  The one for the horizontal control is on the bottom carriage. The sensor must be positioned properly on the plastic track or it WILL NOT WORK.

 I discovered that I had improperly installed the sensor originally.  I fixed it and hopefully now it will be more consistent in delivering stitches. 

Machine quilting on a frame involves many more variables than FMQ on a table.  I enjoy it when it goes well.    I know that I can do it.  I have done it in the past.  I am sure that some how I will figure it out.   Someday.  Hopefully soon.

I think, though, that Steven had the most fun today.  He had a chance to play with the Kubota moving gravel.  Yes, it is April 30.  Yes he is wearing gloves, an insulated sweat shirt and a hat.  It's our climate.

 Wrigley doesn't care about the cold.


Sunday, April 27, 2014

GOAL SETTING. TWO: Service the Bailey

(I acknowledge that  I am breaking a blogosphere taboo by publishing more than one post in a 24 hour period. )

Four years is a long time in a sewing machine's world.  All sorts of things can happen during that time:  congealing oil, condensation, temperature change, rust.   Even brand new machines can get gunked up and can need servicing. 

I was concerned about the Bailey since I had not used it in that long.  True one winter I kept a little heated hut over it (http://mysewingmachineobsession.blogspot.com/2012/01/room-of-its-own.html).  But this past winter I moved it from the sewing loft to the apartment.  I don't think the temperature swings were as extreme in the apartment as they were in the loft.  I probably should have put the little igloo back over it.  I didn't

Given what I know about machines, I truly wanted to check out the Bailey before I started sewing with it again.  Yesterday, Betsy and I tore into it. 

I don't have a photo of the shuttle gears.  I wish I did.  Next time I clean them and oil them I will snap one.  They aren't that big.  Singer 201 gears are bigger. Singer 201 gears are all metal.  The Bailey has one either nylon or plastic gear articulating with a metal gear.  Go figure.  The motor is a universal sewing machine motor and looks easy to replace, should the need arise. The belt meets a plastic handwheel.   There are some plastic bushings and that piece from the upper shaft to the lower one could be beefier, IMHO.

I wish it were easier to access the tension.  To do so you have to remove the whole front panel; ok it's only two screws.  I will quit complaining.

I prefer face on tension assemblies.  I don't like the "lie in" ones.  We found a piece of thread stuck in there.

It was not hard to remove. Had it been a face on tension assembly, one would have seen it straight away when it became lodged.  I have used face on tension assembly machines in this application before and they worked just fine.  But this is what it is.

I sure would like to know what he used as the starting point for this "bastardization."  

 The hand wheel and belt look adequate.  I think that the hand wheel is plastic.  In 25 years likely it will need replacing.  


By 3:30 we had it all back together and set up on the frame.
Admittedly, the first row of stitches SUCKED POND WATER.  I had forgotten to tighten the tension.  We managed to complete one row of stitches, break a needle and give up for the day.  But the goal was accomplished.  The Bailey was serviced.

I am humbled.

Go here to see a truly amazing display of craftsmanship.  One day I will do this.  One day.  Not soon.  I will definitely need help with the dove tailing.  I think Steven might have a dove tailing tool.
http://theprojectlady.blogspot.com/2014/01/singer-sewing-machine-wood-base.html


GOAL SETTING. One: Quilt Frame prep

I have had one goal lately: get the Bailey set up and stitching.  What is the Bailey?  It is a mid arm quilting machine created by Chuck Bailey of The Bailey Sewing Center in Leicester, NY.  http://www.baileyssewingcenter.com/test.html

I bought my 17Pro in 2010.  Just before I went wacko with SMAD.  It has been sitting and waiting for me to start my recovery.  I think I may be ready. 
Setting this up is a process.  I started by sewing zippers to the pink cloth leaders that you see in the photo.  This will enable me to more easily attach the quilt back and top to the frame.  The original design calls for pinning the back and top to these leaders.  Let me tell you.  That is a PITA.  I have done it and I don't want to do it again.  EVER.

Supposedly you can sew one side of the  zipper to the cloth leader and baste  the other side to the edge of the quilt, thus allowing you to zip the quilt on quickly to set up for machine quilting.  I thought about that and decided that I did not want to fragment the cloth of the zipper each time I removed the zipper from a quilt.  So I sewed the other side of the zipper to some narrower cloth leaders on Friday so that I could accomplish my goal for that day: get the practice quilt set up on the frame.


There are four rails.  Rail One accepts the quilt top, batting, and quilt back.  Rail Two holds the quilt back.  Rail three holds the quilt top.   In order to keep it orderly, I basted the top and back together in the sewing loft BEFORE I basted on the zipper.  Then I basted one zipper each  to the opposite edges of the quilt top and the quilt back.  I did this all in the sewing loft.  Far away from the quilt frame which is in the guest apartment over the shop (It's the only place the sucker will fit).

I traipsed out to the apartment just before dinner on Friday.   Steven was OOT so I did not have to worry about time.  The dogs could certainly wait.  I discovered, much to my chagrin, that I had sewn the zippers to the quilt backwards.  Luckily, I had basted them on. 

The dogs got their supper, but not until I had removed the zippers from the quilt top and back.  Then I got a bright idea.  Take a machine out to the GA (Guest Apartment) and make sure you do it right this time, Lizzy.  So I did.  I took Duane with me.  That's how I knew he had a dead spot in his motor.

OK.  Once I got the zip leaders all set up correctly I zipped the quilt on.  Worked great !  But something was wrong  It just didn't look right.  Something was backwards.   Intuitively I thought that the back should attach  to rail number three, one edge of the top to rail two and both back and top, with batting in between should attach to rail number one.  I was 33% correct. 

I got out the instructions and discovered my error.  It is counter intuitive, but the back attaches to number two, the top to number three and both attach to number one.  Surprisingly,  I did not swear.  I just ripped the zippers out and attached them correctly.
Rail number four (I bet you can figure out which one that is) will hold a roll of batting.  This is practice and there isn't much fabric so there isn't much batting.  Also, I would pay much more attention to getting out  those wrinkles a real quilt. 

I accomplished that goal with three hours to spare.  I celebrated.  Yessir I did.

Next goal: Service the Bailey.


Friday, April 25, 2014

Poor Duane

For some reason it took  F O R E V E R today to set up the GMQ (Grace Machine Quilter) frame.  I was up and out in the sewing loft by 0900. OK it took a bit of time to light the fire.  True I had to find some fabric for the practice piece, as well as some batting and backing.  Of course  I had to clear off the cutting table. Then I had to  find an old sheet, iron it, cut some four inch strips, sew them together, sew on the zippers and then ALL OF A SUDDEN IT WAS 1130 !!!! 

HOW DID THAT HAPPEN?

IS TIME GOING FASTER?  I am no physicist but I wonder....

I had to get to the Quilt Zoo.  I was meeting someone there and I was late.  On Fridays the Zoo hosts an open sew.  Folks come with their projects and we all sew together.  Technically the Open Sew is from 11:00 to 1:00.  But I know that if you show up anytime you can hang out there. CUSTOMER IS KING.  My intent was to arrive right at 12:00.  There was no way I was going to make it.  So, I pulled up my socks, threw on a skirt and a vest, locked the dogs up in their room (Wrigley has been a VBD (Very Bad Dog). This is different from being NAGD (Not A Good Dog) and I took off.

 When I arrived, there was no room anywhere to park. (I took this photo just before I left at 2:30. Everyone else was gone)     Parking, as you can see, is tight. Three vehicles take up all of the space in front.   I am not allowed to mention where most of the folks were parked.  I parked the next street over and cut across the neighbor's lawn. 

There must have been ten or more people in the class room.   What fun!  I pulled out my Featherweight.  I don't usually name machines anymore.  This one, though, Betsy and I named Duane.  It is sort of named after the person from whom we bought it.  http://mysewingmachineobsession.blogspot.com/2012/03/just-give-him-money-for-petes-sake.html
Duane wasn't his real name, but we called him that and, hence, we call the machine Duane. 

I wanted to piece the backing for the Disappearing Nine Patch.  I had made a big nine patch block and cut it into four smaller blocks for the back.  All I had to do was sew them up.  I wound a bobbin and threaded Duane.  I started my first seam. No power to the motor.  Now that was ODD.  I had just wound a bobbin; the light was working fine.  What was up?  Must be the foot controller. 

I fetched my tools from the car and took the controller apart.  Perfect condition.  M. suggested that I use her controller (she brought a FW with her for me to service) . Brilliant idea !  The machine worked !  I was stitching happily along.  Then, at the start of another seam, nothing.  No power again.  I gave the handwheel a push and it the motor kicked back in.  

Must be the belt is too loose.   I tightened the belt and it seemed fine for the rest of that sewing session.

 Sadly,  when I was using it later to sew the zip leaders (don't ask), same thing.  No power, no nothing, no hum, no noise.  Every time I would give it a push with the hand wheel, though, it would be fine and it would start right up again. 

I am thinking  Duane has a dead spot in his motor.  Poor Duane.


Monday, April 21, 2014

KENMORE 158.1040 STOP WASHER

I had an email today from a reader.  Appears that there is some difficulty positioning the stop washer on the Kenmore 158.1040.  Despite numerous trials and errors, still no success.

I recently sewed with my lovely little Keatherweight.  I know that my stop washer is installed correctly.  In the interest of stop washer problems everywhere I post these photos.

Loosen the set screw.  On Singers this doesn't have to come all the way out.  This one did. 
Turn the outer part of the hand wheel to remove it. 
Stop washer position.  The tabs are positioned OUT.  Thus, when the little set screw is tightened down and one turns the outside of the hand wheel to release the clutch and allow for bobbin winding, it will catch on a tab.  If improperly positioned, it won't turn far enough to allow the free spinning of the motor and will still run the machine. There are two choices.  If one doesn't work, turn the stop washer 180 degrees the opposite way and it should work.   I have found that if the shaft is dirty and if the center of the hand wheel is dirty and gunked with old oil, no matter the position, it will still turn.  So clean it up good.  Hope this helps, Kevin.

Sunday, April 20, 2014

HOW TO REMOVE A SEWING MACHINE HEAD FROM A CABINET OR CASE

The very first vintage sewing machine that I bought, came home in its cabinet.  I just hoisted the whole kit n kaboodle into the back of the van.  I was unaware that the head could easily pop out of the cabinet.  Such activity damaged the cabinet.  I have repaired it but I sure do wish I had known about this in the first place. 
I may have covered this in a previous post but nothing pops up when I search.  I  am not in the mood to scroll through all of my posts so I am providing the information here, again or for the first time.

I am a member of the FB group Vintage Sewing Machines.  There, someone inquired about removing the head of the machine from a cabinet.  I took pictures of the set screws on the  Monty Ward HA-1 I just serviced.  The concept is the same for a cabinet machine.  If there is wiring attaching machine  to the cabinet that wiring will also have to be removed from the machine.  This photo shows the basic concept of set screws in the machine that hold the hinge pins tight.  Tip the machine back, out of the case or the cabinet.  A good flash light helps a whole lot.  Identify the screws in the back of the base of the machine.  Circled in the photo below. 

Loosen the set screws just enough to release the pin.  Don't lose the set screw.  If you do, you can get them from one of the suppliers, or me.  I have some.  Singer set screws are likely proprietary.  I think Singer machined their own screws.  Just to screw us.  (More management training)
When you place the machine back in the case or cabinet, use a rubber band to hold the hinge pins up.  This will allow you to line up the hinge pins with the holes more easily.  Be sure to tighten the set screws completely so that the machine is secure.

MONTGOMERY WARD CLASS 15 STRAIGHT STITCH AKA HA-1


We took in this adorable Montgomery Ward Class 15 (AKA HA-1) a couple of weeks ago.   This was the only thing on my list for today.  Which was probably a good thing since it took me all day to finish servicing this machine.  It was dry dry dry.  Which is probably better than wet; as in oily wet or rusty wet.

The wires to the motor were shot and I do not like to re-wire universal motors.  It is more efficient to replace the motor. Or so I thought.    First I had to find a motor.  I found a nice, used motor, quiet and smooth.  BUT it didn't really fit.  I couldn't take off the mounting bracket easily to make it fit, either.  The motor sat right against the back of the pillar.  That wouldn't do, not at all.

I found an older motor with a removable bracket and was able to use it.  I had to use the bracket that came with this machine, though, because the mounting screw was too wide to fit through the mounting bracket that came with the "new" used motor.

Spatial relationships challenge me. I looked at the belt as it came off of the handwheel and went around the motor pulley.    It was off.  Not off as much as the sag on Falling Water (Frank Lloyd Wright's famous house southeast of Pittsburgh.  Holy Cow.  I did not notice that the first time I was there.  The tour guide advised that it is off by 7 inches. (TWSS)

 I looked for a different motor, to see if I could find a better fit.  No go.  So then I decided to adjust the mounting bracket on the motor and just use one screw to fasten the bracket to the motor. .  I moved the bracket in the direction I THOUGHT would work.  That made it worse.  Well, good!  All I had to do was move the stupid bracket the opposite way.  I did and it fit. (Note how I blame the bracket for my stupidity. I am training for a management position).

The belt that came with the machine wasn't the greatest.  It was one of those rubber band type of belts.  A bit thick and a bit big.    In an effort to keep costs low for the owner, I decided to just go with it.  Until I sewed with the machine.  Then I just couldn't stand it.  I put on a black lug belt.  Nice, a bit noisier, but at least it doesn't slip when you sew.

 This machine comes in a "portable case" with a motor block; power cord and foot controller attached to the case.  The wiring to the light was good and I took off the block and checked it out too.  Seemed ok.  Now when you have this situation, the cords from the light and the motor pass through a small hole in the back of the machine to avoid getting crimped by the machine bed.   Here you can see the hole but not the rubber grommet.  You can also see the condition of the original motor wires.  EEEEKKKKK!!!!!


 I had cut the bad wires so it was easy to get the old motor off.  In order to put the "new used" motor wires through this hole, I had to re-wire the plug.  It was an old fashioned plug, the kind that you just wind the wire around the connections and tighten the screw   The most challenging part was getting the "new used" wire through the stress relief grommet that fits into the hole on the bed of the machine.  Thank you KY jelly.

The actual mechanical servicing went quite easily.  A bit of Tri-flow and some heat was all it took, really.  Oh, and I did re-glue the base of the case in a couple of places.  I just had to.

She looks pretty good. I put on a new BW tire and shined her all up.  She sews nicely. Feed dogs drop readily for FMQ or darning.   No problems going through multiple layers but I would not call it an Industrial Strength.  Treadle worthy as well. 
I am not in love with this machine, which is a good thing since it belongs to someone else.  Perhaps there is hope for me yet.  Oh I forgot.  I have this machine, only in a different color.


If you have a similar machine, and they were produced in Japan by the millions, you can find a copy of a generic manual here:
http://www.ismacs.net/singer_sewing_machine_company/manuals/ha-1-ib-wgh-instruction-manual.pdf

Saturday, April 12, 2014

Thread

Go to this link to read about different qualities of various threads.  This makes sense.  I will be shopping for Mettler.

http://sewing.about.com/library/weekly/aa102100a.htm

Friday, April 11, 2014

Mickey and Disappearing Nine Patch

I went over to the QuiltZoo this afternoon.  Nina and Bonnie encourage us to come and hang out on Fridays so that we can sew and commune.  I haven't had a chance to get there much.  Today I was determined to do so.

I vacuumed 5 months worth of crud out of the front of the red Jetta this morning and then gathered up some fabric, a machine and some sewing notions and headed over.

When I got there, Barb was having tension issues with her Singer.  She had given up on Mickey, her brother embroidery machine.  It seems that when she was vacuuming that morning, the thread from Mickey got caught in the vacuum and before Barb noticed, all of the thread was unwound from the spool and wound onto the beater bar of her vacuum.  This activity bent the needle and rendered the machine useless even though Barb changed the needle, and rethreaded top and bottom.

We figured out that the Singer tension problem was using a class 15 bobbin in an Apollo bobbin case (class 66 bobbins).  She began, happily, sewing on her quilt binding .  I tried my hand at Mickey. Trusting that what I had been told was true,(new needle, new thread top and bobbin)  I took off the needle plate and tried to figure out what was wrong.  I could not.  The machine would pick up one stitch but would not sew after that . AT ALL.

I looked at the top threading.  It was impossible to figure out.  I saw a bobbin in there(not pictured) and asked:

"Did you re-thread the top, when you changed the needle?"  I asked. 

"Yes, we did." Barb admitted to using a bobbin, not a spool of thread on top.  WTHK if that makes a difference. 

 I suggested that we use a real spool of thread.

That whole gizmo comes out.  Really.  What you see under that plastic is a cartridge of sorts.  You wind the thread through its path and then, with the machine turned on, gently place the whole thing back into the machine and it automatically threads the needle. 


It worked. 

That will be fifty bucks, Ma'am.

 I wasn't surprised that the machine wasn't stitching when I saw the condition of the bobbin she was using on top.   It was loosely wound and very uneven.  I bet that automatic threading mechanism was confused and just doing the best it possibly could.

So I was finally able to sew.  I had taken along my Keatherweight (I love that machine) and some pre-cut squares.  I wanted to construct a nine patch block and show Barb how to make it disappear.

First make a nine patch block.   Then cut it in half one way and then the other to make four smaller blocks.  I used a Jewel pack that has been kicking around for ever.  I didn't really like this combination.

The fun begins once you have the smaller blocks.  There are many possible arrangements.


Sorry about the lousy iPhone photos.  But you get the idea.

I finished piecing a D9P (Disappearing9patch) on Wednesday.  I used a lovely, 1938 201.  I love that machine too.

I strip pieced these blocks and got confused in the process.  There are 16 original blocks.   I had intended to piece all 16 identically but made a mistake and ended up with 8 each of two different combinations.  It worked out OK, though.  I love this fabric.  Yes, some would prefer that the peacocks and other birds were all oriented in the same direction.  I don't mind.  The vibrant colors make up for that error.

My goal is to finish this and quilt it on the frame with the mid arm Baily Home Quilter.  Lofty goals. 

Saturday, April 5, 2014

A Kenmore and a Montgomery Ward

It snowed again today right after I gave Frannie her hair cut.  It didn't last long.  The sun tried to come out but the clouds kept beating it back.  The dogs and I went for a walk just as a little bit of sunshine peaked through the clouds.   I neglected to wear gloves; the triumph of hope over experience.  My hands were cold and I cut the walk short.  The dogs didn't mind the wind, the snow or the cold.   The ground was bare and a winter's worth of deer and rabbit poop awaited them.  YUM.

I burned up almost the last of the shop fire wood today.  Betsy came over and we each worked on a machine.  She had a Kenmore (darn, she always gets the Kenmores!) and I pulled out a Montgomery Ward Free arm I have been itching to service for years.  Yes, years.  I bought this machine in 2012 at the same time that I bought a Singer 301 Long bed.  I remember the day.  Steven and I drove to Albany to fetch the 301.  The seller brought out the Montgomery Ward too.  I looked at it, saw that it was a free arm and brought it home.

Since then I have been wanting to get it on the bench.  Instead I kept moving it around the shop.  Someone built a very nice, custom, plywood case for it. The case weighs almost as much as the machine. 

 The machine is all metal, save the hand wheel and some of the knobs.  The camstack is metal.  It was kind of gummed up but a little bit of Tri Flow got it going.

The shuttle gears look miniature to me.  At least compared to Kenmores
The extension table is solid and metal.  It fits into the bed of the machine in three places.  I think it is more secure that the extension tables on the Taiwanese made Kenmores of the late 70s. 

Oh Boy.  I love this machine. Twin Needle capability.  Four stretch stitches, two decorative stitches, straight stitch and zig zag.  You could even put the needle in left position if wanted.  PLUS a very nice, functional built in button hole stitch.  All of the stitches work beautifully.  Comes with some attachments and the manual.  Sweet Machine.  I wonder who made Montgomery Ward machines?  Janome? 

UPDATE. 4/6/14
  Betsy found this information on another blog.  http://www.doubleveil.net/zssmp/wards.htm.

 Yesterday I picked up the Kenmore to service for a customer.  Actually I picked up two machines.  The Kenmore and a Montgomery Ward Straight Stitch HA-1 Class 15.  Unfortunately the wiring on the 15 is a MESS and I put it aside until we could talk to the owner.  It is definitely worth fixing.  It is a lovely machine.

The Kenmore is a 385.  It isn't a clamshell but it isn't metal, either.  It was pretty dirty, gummed up and reverse didn't work.


It is a class 15 machine too; a drop in bobbin.  The bobbin case was loose in the race when Betsy opened up the machine.  I have no idea how she got it working, but she managed to free up the reverse mechanism and we put it through every stitch.  It sews pretty nicely, we have to admit.  We figure the more experience we get with these kinds of machines, the better off we are.  These machines will probably show up in our shop. We'd best know how to fix 'em.

Just the same  I would hate to have to take this mechanism apart.  This is the base of the free arm.


I don't really like the way the stitch selector works on this machine.  It feels chintzy to me.  But I must admit that the recommendations for stitch length, width and presser foot type are useful.


I admit that it made a decent stitch.   For people who want a lot of bells and whistles, it is likely an ok machine, for the time being.  Not for the long haul.  Even my latest love, Ward, likely won't still be stitching in 2084.   I betcha the 1938 Singer 201 will be.  If the motor lasts that long.  I don't see why it wouldn't.     


Friday, April 4, 2014

AN INNOVATIVE BOBBIN WINDER

Check out the bobbin winder on this White 221K
OK  I will make it easier for you
Now I admit, it is an innovative design.  The only problem?  It doesn't seem to work.  I have a replacement for it and the broken motor pulley.  Tomorrow, transformation will take place and I hope to get this little guy stitching again.

A friend and reader (Thank you Betty)  sent me some information from another blog about the drive belt on these machines.  Without permission, I am posting it here:


Unfortunately when I click on the link above, Dave McCallum's Blog, nothing shows up.  So, here is what was sent to me:

 What about the "white" Featherweight?

Monday, Nov 21 2011 10:39 PM | All kinds of other stuff, Featherweight 221

    The white machine is not the same as the black or tan machines.
    How so?
    The white machines body is made cast from the same aluminium alloy as the black and tan machines although the lifting bed extension is made of stamped sheet steel. This was but one production cost savings utilized by Singer so that they could keep producing a machine that had been getting too expensive to keep manufacturing and sell at a price that people would still afford.
     The power cord does not unplug from the base of the machine as the earlier black Featherweights do which was another production cost savings. I prefer a machine that the electrical cord can be unplugged from for storage or carrying about. It really is not the end of the world for me but simply a personal preference.
    The steel base extension works quite well and is strong. This base extension on the white machine is about an inch and a half shorter than the cast aluminum extension found on all black and tan machines. To some this might seem important but actually it doesn't change things much in use.
    The most notable difference and the greatest money saver for Singer was to be found internal to the machine. The black and tan machines are all gear driven, but the design change to the white machine utilizes a cogged drive belt. This had quite the effect on the bottom line.
    How does the cogged belt effect the white machine when compared to the gear driven black and tan machines? The internal belt drive (rather than gears) has proven to be very reliable and it typically runs quieter than its black and tan siblings. I have talked with Graham Forsdyke and Glenn Williams about their experience with the belt drive and they concur with what has been my experience, there is no problem with the cogged belt drive. Although Graham had seen one fail when a person was "adjusting" the belt with his pocket knife. Obviously, this is a design flaw.
    In the 1950s, type-writers were cleaned by immersing them in a chemical bath not unlike the early dry cleaning chemicals. Type writers were soaked, shaken while immersed and dried. Then they were oiled again. Sewing machine service people tried this immersion in cleaning chemicals with Featherweights and found that it worked very well with the black and tan machines. In the 60's the white machine came about and the "sewing machine service people" put the white machine into the chemical bath and the internal drive belt melted in the harsh chemicals used for dry-cleaning back then. The service person had a three hour job ahead of them to remove the internal shafts and replace the cogged belt.The cure for this was that the service people told prospective buyers that "the white machine was not as good as the black machine, believe me I'm a service person and I know". If you are around white Featherweights long enough you will hear people say that "they had a Friend who said she heard that the white machine was not as good as the others. And now you know why. Telling this to prospective buyers kept the service people from getting their fingers dirty by having to clean a machine by hand rather than giving it a bath while they drank coffee. This is a "story" that you can take to the bank. I have talked with "old-timers" (which I am rapidly becoming) who have stated this is the truth.
    I have had to replace the gears in machines before, but never a cogged belt. In my experience the white machine (which isn't white, it is "pale celery" according to Singer) is every bit as good as any other color and I think it can be adjusted to sew marginally better than a well adjusted black or tan machine. I believe it runs smoother internally which in my opinion gives the machine its edge.
    I will not go so far as to say the white machine is better than the others, but it is not a compromised design as had been implied by Singer's own and definitely is not second place to any other.
Dave McCallum