I was at the Quilt Zoo yesterday dropping off a very nice 185. I wanted to leave a machine there for advertising and for customers to try out.
While there a woman came in with her not black, not tan 221K. It looks white to me but in the right light it could almost be pale mint green. None the less, she wanted it serviced. Lucky me to have been there at that moment.
"What ever it takes. I have another one that I use. My husband bought this for me at an auction. I thought it would be good to get it cleaned up so that I would have another. The belt doesn't run the machine."
So I brought it home. The shop was warm (it's all relative up here in the North East.) So I set to work on it. Betsy had already come by so we were both working on machines. She had a Kenmore. Lucky her.
First I checked the wiring. Directly wired to a clamshell controller. No Three Pin Terminal here. It looked safe so I plugged it in. Nope, no machine action, but the motor sounded ok. The belt was moving but there was a mess around the pulley. Black powdery stuff.
I took off the belt.
"Maybe it's the wrong belt" chimed in Betsy as she looked over my shoulder.
"Nope, that's a 221 belt I recognize the part number," said I. Actually it was true, not that I have memorized parts numbers. Yesterday I searched through the mass of belts that came with the South River Inventory (SRI) and found several FW belts. Luckily they were labeled as such and I didn't have to look them up.
"Oh, look," she said, "the pulley is broken."
Sure enough it was destroyed. I managed to remove it by loosening the set screw and wedging it off.
"OH Darn ! I just sent in the Brewer order. "
"How much do we have to spend before we get free shipping?" Betsy asked.
"One hundred and fifty dollars."
"No problem. I will buy more thread." she said.
Well. I am thinking that more thread is the last thing she needs. So instead, this morning I sent an email to Glenn Williams who has an abundance of FW and 301 parts. I bet he has one. Better that, than trying to beef up our order.
Yes, I did search the SRI for the pulley but had no luck. "See, that's what irritates me about this stash of parts," I whined. "All this stuff and not what I need."
As long as I had the motor off (part way off, it was still all wired to the controller). I checked the brushes. Oh my. I had never seen motor brushes this low.
Oh, I am not in the mood to pull this motor apart. I wonder what would happen if I just blew some compressed air through that motor?
"Big noise," I warned Betsy as I plugged in the compressor.
The air around my work bench looked like the last scene in Ghost when that evil spirit was blown away. Remember? It was just a black cloud rushing out of the room. That's what came out of the motor. Black soot and more black soot.
I dropped new brushes in and tested the motor. Sounded good. No ozone odor. Good.
I set about servicing the rest of the machine. I took off the bottom. I looked again. Something seemed wrong. Where are the gears?
I had heard that the later model 221s lacked gears and instead, utilized a drive belt. Another indication that Singer was cheapening the machines. This belt looks good, though. Another reason to avoid the white FW. Now I don't know if they all have belts. Glenn would know.
Anyway, no gears to grease. I oiled the feed mechanism and closed up the top. I oiled the metal contacts on the bottom. Then I looked at the bobbin case base and the hook.
"Oh boy, I sure don't want to pull the hook to get that out. " I muttered.
It really isn't that hard to pull a hook on a FW or a 301. It is a matter of loosening two screws, for heaven's sake. I just didn't want to do it. You have to pay attention to the flat and position the hook correctly when you replace it. If you don't mark the screw that tightens into the flat, you can put the hook on the wrong way. AMHIK.
I completely removed the screw that tightens onto the flat and loosened the other one enough to remove the hook. Of course the hook was glued in with old oil. Nothing a little denatured alcohol couldn't release.
In order to remove the looper, I had to tighten the left behind screw completely and remove the screw holding on the looper. Don't loose this screw.
I polished the looper and the back of the hook. I checked the hook or burrs and reassembled everything. Because I had been a clever old lady I was able to pop the hook on easily and not have to fart around with adjusting its position. The machine stitches. I can't test it with the motor yet. Gotta wait for the motor pulley.
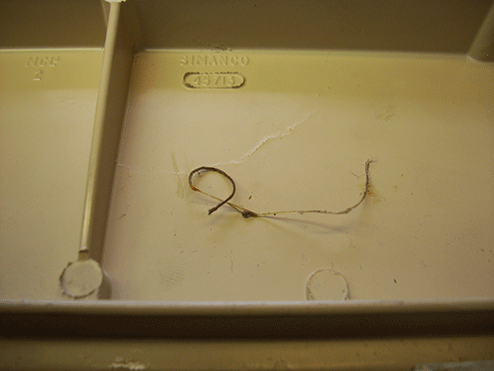
There is more work to be done. It turns out that it was a good thing that I removed the hook. There was another thread wrapped about the shaft. I cleared it, and the rust, away before replacing the hook.
This poor little machine has been well used. It has some battle scars. I think it will still stitch but I doubt the stitch will be as nice as the FWs with gears. Who knows?
A blog devoted to my vintage sewing machines and how I find them, fetch them and fix them.
Showing posts with label 221. Show all posts
Sunday, March 23, 2014
Tuesday, May 22, 2012
SHE DID IT !!!!!
Here it is folks, Betty's 221 motor. She did it all by herself. Isn't she clever? This all started with an email that she sent me with a couple of photos.
If I had been using my Dell Laptop then, instead of my MacBook Pro I would have been able to save and enlarge the photo and probably have been able to see that her concern was over the thicker insulation on the two wires.
Well, she did it she got her motor off and was able to figure out what the heck that was. Of course, hind sight is always 20/20 vision. I learned something and she did too. She learned that she can take a motor off of a Feather weight. Ain't this hobby The Best?
If I had been using my Dell Laptop then, instead of my MacBook Pro I would have been able to save and enlarge the photo and probably have been able to see that her concern was over the thicker insulation on the two wires.
Well, she did it she got her motor off and was able to figure out what the heck that was. Of course, hind sight is always 20/20 vision. I learned something and she did too. She learned that she can take a motor off of a Feather weight. Ain't this hobby The Best?
Wednesday, February 8, 2012
My First Job
Who knows why this post was stuck in drafts? I wrote it last February. Here it is. I guess I am on the FW topic these days.
As always, I was chatting about my obsession at work one day. A woman I know mentioned that she had a little sewing machine in her attic that she hadn't used because it wouldn't stitch anymore. After more inquiry I knew that it was a featherweight. She brought it by work on Tuesday for me to fix.
Of course I could not wait until I got home to look at it. When I initially talked with P. about the machine I figured it had a thread lock. Then when I looked at the machine yesterday I saw that the "finger" on the bobbin case base was not positioned appropriately.
This morning I set to work. I went through the whole machine and oiled every place indicated in the manual. I like to give the machine a drink FIRST THING. In this photo, you can see the errant thread. I took the bobbin case and bobbin out and got out my favorite Brownell bit (150-3) and removed the gib screw.
It took a bit of jiggling but the bobbin case base came out and so did the thread.
When I am driving to and from work this time of year, I know enough to look for more deer if I see one in the road. Such is the case with thread locks in 221s and 301s. I looked, and sure enough there was another tail of thread sticking out of the hook. DANG. So I had to get out the screw driver AGAIN. The hook set screws are accessible through a "window" in the base of the machine. I did not know that one of them sits in a flat. I arbitrarily selected this set screw to remove all the way so that I would know which one of the screws would need to line up with the other screws at the bottom of the machine. This way I would not replace the hook in the wrong position. Turns out that this set screw was sitting in the flat.
The arrow in this photo points to the hook shaft flat. Now there's a catchy phrase. Sounds like it could be a Country Music Song. I couldn't get her stitchin, cuz I missed the hook shaft flat.
In order to get that piece of thread out, I had to remove this screw to get the looper off the hook. Can you see those scrapes on the back of the hook? I think an errant needle made those. Certainly the looper had some burrs on it. I left them and these needle marks. I decided that if it did not stitch well I could go back and sand them down.
That was the biggest part of this job. Once I had the thread lock out, the hook cleaned and back on the machine, I finished the servicing. The bobbin winder was pretty dirty and required a fair amount of rinsing and spraying with canned air. But finally it was suitable and I re-assembled the machine and got it stitching.
I spent two hours on it. I am horribly inefficient. I spent too much time getting the hook back on, despite my knowing about the hook shaft flat. I did NOT remove the feed dogs or dis-assemble the tension. I did clean them, of course. I did have to adjust the tension number dial so that it would read at "4" . I cleaned the machine itself with some Awesome and T3-3. The motor sounded happier and happier the more I ran it. I think it was happy it got greased. The brushes looked fine and the commutator was not too dirty so I did NO MOTOR work.
I think it looks lovely and what is more, it stitches.
As always, I was chatting about my obsession at work one day. A woman I know mentioned that she had a little sewing machine in her attic that she hadn't used because it wouldn't stitch anymore. After more inquiry I knew that it was a featherweight. She brought it by work on Tuesday for me to fix.
Of course I could not wait until I got home to look at it. When I initially talked with P. about the machine I figured it had a thread lock. Then when I looked at the machine yesterday I saw that the "finger" on the bobbin case base was not positioned appropriately.
The arrow in this photo points to the hook shaft flat. Now there's a catchy phrase. Sounds like it could be a Country Music Song. I couldn't get her stitchin, cuz I missed the hook shaft flat.
In order to get that piece of thread out, I had to remove this screw to get the looper off the hook. Can you see those scrapes on the back of the hook? I think an errant needle made those. Certainly the looper had some burrs on it. I left them and these needle marks. I decided that if it did not stitch well I could go back and sand them down.
That was the biggest part of this job. Once I had the thread lock out, the hook cleaned and back on the machine, I finished the servicing. The bobbin winder was pretty dirty and required a fair amount of rinsing and spraying with canned air. But finally it was suitable and I re-assembled the machine and got it stitching.
I spent two hours on it. I am horribly inefficient. I spent too much time getting the hook back on, despite my knowing about the hook shaft flat. I did NOT remove the feed dogs or dis-assemble the tension. I did clean them, of course. I did have to adjust the tension number dial so that it would read at "4" . I cleaned the machine itself with some Awesome and T3-3. The motor sounded happier and happier the more I ran it. I think it was happy it got greased. The brushes looked fine and the commutator was not too dirty so I did NO MOTOR work.
I think it looks lovely and what is more, it stitches.
Saturday, October 29, 2011
Featherweight Stitches!!!!!
Thanks to two very generous and kind folk in the sewing machine community, my Centennial featherweight stitches. I must thank Deloris Pickens (http://singerfeatherweight221.blogspot.com/ ) and Glenn Williams (http://pages.suddenlink.net/joyof301s/glenn.htm). They helped me out with two very important parts: the needle plate and the hook. I cannot say enough about how kind and generous these folk are. When I posted on one of my yahoo groups that I had purchased a featherweight at an auction and it was lacking the bobbin case base position bracket, Mrs. Pickens emailed me and offered me a needle plate complete with the position bracket. What great good luck THAT was. I also received an email from another group member who directed me to Mr. Williams. I emailed him, and he called me back. At first I thought that the bobbin case base was the problem. Mr. Williams sent me one promptly when I ordered it. I swear my check and the bcb crossed in the mail. When it turned out to be the whole hook assembly, no problem. I emailed him that I was returning the bcb. He emailed me right back and offered to take my complete faulty hook assembly, the bcb he sent me in exchange for a complete and functional hook assembly. Now how about that? I sent his bcb back to him along with my complete faulty hook assembly and I KNOW that the new complete hook assembly and my parts crossed in the mail. Today I received the new parts and I was able to take a stitch with Glenda Dee (wonder why I named her that?) today. OOOOHHHH I love this machine. No wonder everyone wants one. What a nice, straight, stitch.
Subscribe to:
Posts (Atom)