There is Turkey Season, there is Deer Season. In Vermont, there is Moose Season . In Westford it is fly season. They are everywhere. I am gleefully hunting flies everyday with the swatter. We have one in each room. Alice was a bit put off when I whacked one right next to her cereal bowl this morning. OK I can be a bit more polite.
Still, there is something about killing a fly that is just so satisfying. I confess. I sure wish I could nail the one that has been buzzing me for the past thirty minutes.
Tuesday, August 28, 2012
Two Nuts and Two Baskets
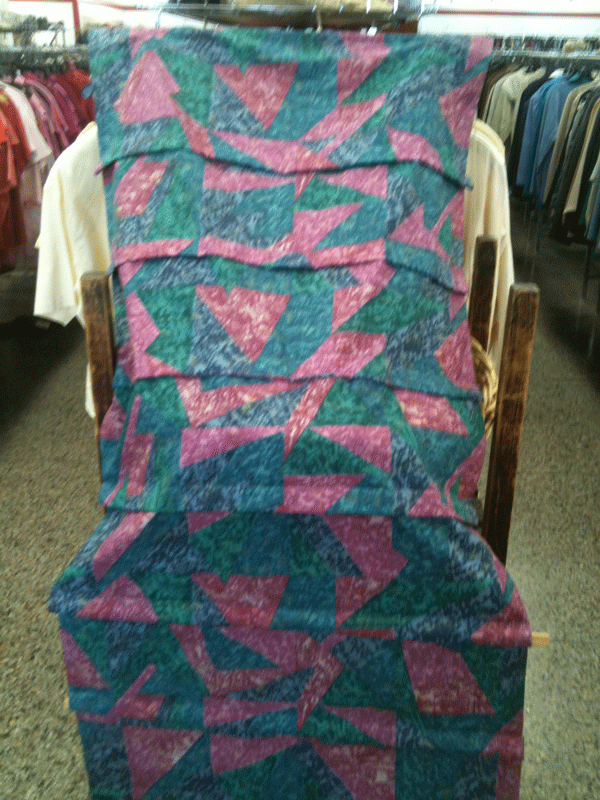
Alice is way into this Fabric Basket thing. She wanted to make another so we did today. She made a bigger one. I made a different pattern and an even bigger one. I got the pattern on line. (http://www.jcarolinecreative.com/Merchant2/merchant.mvc?Store_Code=JC&Screen=STORAGE_BASKETS)
Alice used the same pattern from yesterday; modified for size.
We had a great time. While she was cutting out her pieces, I readied the Kenmore 158.1947 that she is taking home. I got it stitching and then it started making a terrible racket. I was so upset. Here was a chance to unload a machine. It is a good machine, a bit noisy, but makes very nice stitches. It has a free arm. Cosmetically its beat.
I was happily sewing on it but it started making a terrible rattle. And the thread kept breaking. I was BUMMED. I thought that maybe the shuttle spring was bent or broken. I took it to the shop. The spring was fine. I switched out hooks, I took the bottom off, I pulled the grease cover. I just could not figure it out. Oh well, I have a cute Montgomery Ward that I can service and send home with her. Then I noticed.
 How that stitch selector knob got turned halfway on the special stitches I will never know. That fixed it. WHEW!!!


Alice used the same pattern from yesterday; modified for size.
 |
| YESTERDAY'S |
 |
| Kenmore 158.1947 |
 |
| Nut One: Alice (she's from Chicago. Thus explains the Harry Carrey glasses) |
 |
| Nut Two: Elizabeth |
 |
| Two Baskets |
Monday, August 27, 2012
Same tree, different nut.
Alice saw a little fabric "box" I had made when she was out in the shop
yesterday. I offered to help her make one. She took me up on it. She
had to practice a bit before actually stitching her project.
She likes this Kenmore 10 stitch. I do too. There is no way she is taking it home. Instead I have a Kenmore 158.1947 for her. It has a free arm ("I Have to Have a Free Arm") and it makes a lovely stitch. It actually is a better machine, heavier and stronger. Made in Japan, not Taiwan, not that there is a blessed thing wrong with Taiwan.
Mom was loving it. I learned today that Mom's mother was not into sewing. Instead she hired a dressmaker to teach Mom to sew. She did not sew much during high school but after she got married, she and some of her friends would take sewing lessons from the Home Bureau. She said that she would work all day and finally, at 10 oclock at night get a chance to sew. I do remember her sewing away late at night. Especially around Christmas.
I also remember coveting my sister's Sweet Sue doll (http://www.nancysantiquesdollsandtoys.com/Online_catalog/1950s_dolls/Mvc-005f.jpg ) It was beautiful and I wanted one ever so much. I asked for one for Christmas that year. And Christmas morning there it was under the tree. I recognized the box! Oh was I thrilled! Until I opened the box and found a velvet, hand made DRESS, that I am certain my mother spent HOURS stitching, late into the night. I was a MOST ungracious child. I never did get the Sweet Sue Doll. I did HAVE to wear the dress to church though. I am sure I hated it.
Complete the circle
I had an email from a reader who has a Kenmore 158.1561281. It's jammed. It sounds like a thread lock. It occurred to me that perhaps folks don't know how to get the hook out of this type of machine.
When I bought my mid arm Bailey (http://www.baileyssewingcenter.com/homequilter.html) Mr. Bailey taught me how to take the hook out and put it back in. This step is necessary every time the bobbin is changed because so much lint can build up and he recommends oiling the race every bobbin change. "Complete the circle" was his way of explaining how the hook goes back in. Perfect.
First you have to get the hook out.
On the free arm it is easy.
Open the door
 Remove the bobbin case
 Identify the two tabs that hold the race cover in place
 They simply turn outward to release the race cover
 Pull on the stem of the hook and everything falls out. Unless it is really gummed up or there is thread caught around the hook
 This is the time that I clean the race and the hook. I check the hook for burrs and hone any rough spots. You have to be careful to gently hone any burrs. The hook must have a sharp hook so that it can pick up the thread.
When putting it all back together, complete the circle

 Replace the race cover making sure that the tab on it matches the notch in the race assembly. It really won't go in easily any other way. (That isn't dirt in there; it is artifact from the "Smart Fix" in Photo Shop)
 Then just put the tabs back over in place

And replace your bobbin case. Be sure that the bobbin case finger fits into the notch in the race cover. It won't work otherwise.

When I bought my mid arm Bailey (http://www.baileyssewingcenter.com/homequilter.html) Mr. Bailey taught me how to take the hook out and put it back in. This step is necessary every time the bobbin is changed because so much lint can build up and he recommends oiling the race every bobbin change. "Complete the circle" was his way of explaining how the hook goes back in. Perfect.
First you have to get the hook out.
On the free arm it is easy.
Open the door
When putting it all back together, complete the circle
And replace your bobbin case. Be sure that the bobbin case finger fits into the notch in the race cover. It won't work otherwise.
Sunday, August 26, 2012
APPALLED


Thursday, August 23, 2012
Remarkable Restraint
Mom and Alice are here. They arrived yesterday. I was working on a couple of tote bags for the teen aged grand daughters. After supper we went back out to the sewing loft to finish them up. Mom was wandering around the loft, checking things out. Then she said "I was just thinking that if I had not restrained myself, my sewing room would have looked like this...."
See? The nut doesn't fall far from the tree..


See? The nut doesn't fall far from the tree..
Wednesday, August 22, 2012

Monday, August 20, 2012
Sunday, August 19, 2012
Blue Thread

It likes blue thread just fine.

Waste of Time? or Therapy.

The first one to get it right gets a trip to the Cooperstown Hall of Fame, no expenses paid, but you can stay for free in our little guest apartment for one night. After that you will have to fix one sewing machine per day for rent........
Then after I sewed, I intended to tidy up the shop. Instead I got distracted by the 115 on the bench. It is one filthy little machine. Before I knew it it was 2:30 and I told myself that I would just get the presser bar out and then do my chores. Next thing I knew it was 4:30. The presser bar was out, the feed dogs were out, the hook was off and the handwheel was off. I just kept going. Just one more thing. I finally stopped. Cleaned up (sort of) and oh one more little thing. I cleaned off the decal next to the face plate on the front.
Remember what it looked like before? No? I will remind you.

Now, my problem is that I have no idea when I will have time to clean the parts that I have removed, and put them back on. I did a quick job on the handwheel. The face plate needs more work and the needle bar and take up lever have a bit of a whisper that makes me think there must be more dirt where I can't reach it. I have never taken the needle bar out of a machine. I don't think I want to do so on this one. I have only one 115. I will venture in where no woman has gone before, if I have another identical machine.
So, I didn't get the vacuuming done. But I feel a whole lot less anxious, angry and depressed. So I don't think this was any waste of time. It was therapy.
Remember the Pfaff
Today Betsy and I went to fetch a Barrister Book Case for my fabric. I wanted something that is enclosed to store the fabric. I found it on Craigslist and she helped me with her truck.
When we got there, both of us knew that it was over priced and cheaply made. I bought it anyway. I felt obligated, since I had said that I would buy it.
"I am sure you would pay more for it brand new at Wal Mart."
"Be careful of the back. Don't break the cardboard."
"Look genuine imitation cherry veneer."

Between her teasing me and my perseverating, we have spent the morning laughing and lamenting all at the same time about it. Of course, we also remembered all the deals we made along with some of the other really really stupid purchases. We vowed that we would, in the future, save each other from similar mistakes.
"You have to save me, next time Betsy. Just tell me 'No.'
"Yes, but I thought you really wanted it. OK how about if you ask me 'What do you think?' and that way if you really want it, you can say so, otherwise we can just say we're sorry and leave."
"OK, I guess that could work. Still, I can't believe I bought it. You should have jumped in and stopped me."
"But I thought you really wanted it."
"I did! But it was just STUPID of me to buy it!"
Betsy is such a good friend. She just HAD to make me feel better.
"Well, remember that [expletive deleted] Pfaff that I bought that has too many steps and I can't figure out how to work and I hate? See, I do it too. You were there. You were supposed to stop me then, too!"
"So, when I am about to spend too much on a piece of junk, just say:
 'Remember the Pfaff!'"
When we got there, both of us knew that it was over priced and cheaply made. I bought it anyway. I felt obligated, since I had said that I would buy it.
"I am sure you would pay more for it brand new at Wal Mart."
"Be careful of the back. Don't break the cardboard."
"Look genuine imitation cherry veneer."

Between her teasing me and my perseverating, we have spent the morning laughing and lamenting all at the same time about it. Of course, we also remembered all the deals we made along with some of the other really really stupid purchases. We vowed that we would, in the future, save each other from similar mistakes.
"You have to save me, next time Betsy. Just tell me 'No.'
"Yes, but I thought you really wanted it. OK how about if you ask me 'What do you think?' and that way if you really want it, you can say so, otherwise we can just say we're sorry and leave."
"OK, I guess that could work. Still, I can't believe I bought it. You should have jumped in and stopped me."
"But I thought you really wanted it."
"I did! But it was just STUPID of me to buy it!"
Betsy is such a good friend. She just HAD to make me feel better.
"Well, remember that [expletive deleted] Pfaff that I bought that has too many steps and I can't figure out how to work and I hate? See, I do it too. You were there. You were supposed to stop me then, too!"
"So, when I am about to spend too much on a piece of junk, just say:
Thursday, August 16, 2012
Waiting

I know this isn't about sewing or sewing machines. But did you really want to hear all about how I cleaned the house, had MY teeth cleaned and then cleaned the sewing loft? (Sort of. It's a work in progress, as always)
Looking at a dog driving is much more fun.....
This weekend...photos of machines and more adventures. I took the icky tension assembly apart on the 115. It needs a check spring. Wonder if the check spring for a 15-91 will work? I guess I will find out....
Wednesday, August 15, 2012
Viking 6000 something
Sometime in 1979 or 1980 I traded in my Kenmore for a Viking 6000 something. I can't remember the exact model number. I had that machine for years. I wish I still had it. I gave it to a co-worker when Mom bought the Viking Quilt Designer for me. I thought it was frivolous to have two machines. That was about 12 years ago. I wish I still had the Kenmore and the Viking. What great machines. I upgraded to a Designer II. I am not in love with that machine.
Yesterday I was shopping for a storage cabinet for my fabric. I want to be able to see it. I am hoping that something like a glass door armoire or hutch would work. I went to Sal's (Salvation Army) in search of something used.... No luck with the furniture. But when I rounded the corner to exit an aisle I saw a bin and immediately recognized its contents:
 That is a roman shade that I made about 1993 or 1994. I used the Viking. I looked at the stitches. Nice and straight. Wish I still had the machine.
I know how the shades (there are two more) ended up at Sal's. Finally someone where I used to live got tired of them, took them down and donated them. I wasn't sad. I was pleased, and somewhat surprised, to see that they were so well made. Like I said, I wish I still had that machine.....
Yesterday I was shopping for a storage cabinet for my fabric. I want to be able to see it. I am hoping that something like a glass door armoire or hutch would work. I went to Sal's (Salvation Army) in search of something used.... No luck with the furniture. But when I rounded the corner to exit an aisle I saw a bin and immediately recognized its contents:
I know how the shades (there are two more) ended up at Sal's. Finally someone where I used to live got tired of them, took them down and donated them. I wasn't sad. I was pleased, and somewhat surprised, to see that they were so well made. Like I said, I wish I still had that machine.....
Monday, August 13, 2012
Happy Birthday, AGAIN
Today is Betsy's birthday. In celebration, yesterday we drove off to West Springfield, MA to shop at Osgoods (http://www.osgoodtextile.com/). It was overwhelming.
This is Betsy's cart. I was not allowed to show her; only her cart

This is my cart, after much of it was already measured and cut.
 Russ, the nice gentleman who cut our fabric, was congenial and cheerful. He suggested that we come back during the week. It is not as busy then. I think we just might. There were a lot of people there. But no one had carts as full as ours. It took us an hour just to have our fabric measured and cut and for us to check out.
This is a wheel on one of the carts. Talk about a thread nest. The thing rolls. But not very well....
 We had a blast.
I now have a life time supply of fabric, to match my lifetime supply of sewing machines....
I can't wait to go back in the spring to celebrate MY birthday......
 |
This is my cart, after much of it was already measured and cut.
This is a wheel on one of the carts. Talk about a thread nest. The thing rolls. But not very well....
I now have a life time supply of fabric, to match my lifetime supply of sewing machines....
I can't wait to go back in the spring to celebrate MY birthday......
Sunday, August 12, 2012
MSMO First Anniversary
Tomorrow is the blog's first anniversary. Thank you all for reading. I find it hard to believe that there have been over 40,000 hits. Wow.
Saturday, August 11, 2012
The truth comes out
Steven has been very tolerant of my obsession. But this morning he finally confessed that I ALWAYS promise to fix some article of his clothing and I NEVER do. Of course this is hyperbole. I rarely offer to fix anything of his because I honestly am not good at alterations nor do I like mending. But this morning I did comment that his pants needed to be taken in. So that's when the truth came out.
So tonight after dog haircut and baths, I hemmed a pair of his pants.
I should learn how to alter clothes. While I am sleeping
So tonight after dog haircut and baths, I hemmed a pair of his pants.
I should learn how to alter clothes. While I am sleeping
Singer 115
The mystery machine is a Singer 115. A rotary hook. This particular one is from 1916. And she does turn over. All she needed was some Tri Flow.
Now off to groom another dog.
Now off to groom another dog.
Kenmore 158 tension assembly
I promised a reader that I would post a tutorial about the Kenmore 158 tension assembly. As best as I can tell, the 158.1701 (the assembly in question) looks the same or similar to this one.
Oh my, I had no idea how dirty it was. This is from a 158.1803.

The first thing to do is take the whole kitnkaboodle out of the machine.
Loosen the set screw but don't take the screw out. It is tiny and you might lose it. It will release the assembly without coming all the way out.
 Next remove the hex screw from the face of the tension assembly
 The indicator ring will come out as well
 Then you will see this
 You will have to pry this out. You can see that when you replace it, it will only fit ONE way onto the stud.
Next you will see the wavy washer.
 This should fall right out when you flip the assembly over to get this:
 Pull this off and take note of the notch on the inside. (I am not the first person to take this tension assembly apart)
This is what you get next. The washer is quite tight and the stop washer is even tighter.
 To get to the check spring you have to loosen the set screw.

 You have to remove the washer and the stop washer next. Or you could do this before you release the check spring. Might be easier. Check out the position of the stop washer tab. You want it like this when you re-assemble
 The washer comes off readily. Pry the stop washer off gently. You then get this. The cogged "nut" willscrew off easily. Then take off the spring and the tension release pin stop washer.
 Note the position of the "nibs" (red arrow) on the tension release pin stop washer. Don't put it in backwards. It won't work. Ask me how I know.

Tension release pin
 Now I admit, I did not take this whole thing apart here. I just spread things out a bit so that you can see how they go. There are three tension discs. One is flat. The other two are concave. Make sure that the concave discs "kiss" the flat one between eachother with the concave sides facing the flat discs. I think that you can see this here. If your machine does not accept a twin needle you will only have two discs and they should "kiss' eachother with the concave sides in.
 A and E are the outer two discs.
 If you want to change the amount of "spring" in the check spring, you must move it one way or the other in the stud. The short end of the spring fits into one of the slots in the stud. Can't see it so well here. Sorry.

You want things position about like this before you put the casing back on over the check spring
If it doesn't work quite the way you like it, fiddle with it. Move the check spring tail one "notch" on the stud and see what happens.
 Replace the casing making sure that you line it up with the tab on the back of the disc

And make sure that the check spring sits in the indentation in the front of the disc.
 Make sure that you tighten the set screw adequately. Otherwise the whole assembly will twist and you will be very sad. It means starting over, basically.
Put the tension release pin in next. It will really only go in one way. The head is the part that comes into contact with the tension release pin washer which goes on next


 Next put the spring in
 Then the cogged screw. Just get it started.

The Stop washer goes next. It is snug. Don't force it. It must go all the way to the threads. The little tab should line up at the top and should match one of the cogs on the screw.

Next comes the little washer and then the numbered dial.
 When you put the numbered dial on, be sure that little tab on the inside is positioned to the RIGHT of the stop washer tab. It won't twist far enough otherwise.
 Then comes the wavy washer, the tabbed washer and the indicator ring
 The tabbed washer sits on top of the wavy washer snugly. Be sure it is positioned firmly. It only goes one way. Lucky us
 Next put on the indicator ring. It has to fit one way or the other. The tabs on the washer must fitin the indentations on the ring. Line up the white mark as close to zero as you can.(PS the white mark is on the opposite side of the indentations)
 Replace the screw and tighten.

When replacing the tension assembly on the machine you will need the ring that goes between the tension assembly and the machine. It has a serrated notch where a pin from the tension assembly fits

 Put the whole assembly back in the machine, tighten the set screw and stitch it in. WHEW
I marked the set screw scar so that I could re- align it. You can see that I have had the assembly out a couple of times during this process today. New set screw scars.
 I suppose I could have put that white indicator on the top. This project was a bit of a challenge. I don't think it matters where it is.

The first thing to do is take the whole kitnkaboodle out of the machine.
Loosen the set screw but don't take the screw out. It is tiny and you might lose it. It will release the assembly without coming all the way out.
Next you will see the wavy washer.
This is what you get next. The washer is quite tight and the stop washer is even tighter.
Tension release pin
If it doesn't work quite the way you like it, fiddle with it. Move the check spring tail one "notch" on the stud and see what happens.
And make sure that the check spring sits in the indentation in the front of the disc.
Put the tension release pin in next. It will really only go in one way. The head is the part that comes into contact with the tension release pin washer which goes on next

The Stop washer goes next. It is snug. Don't force it. It must go all the way to the threads. The little tab should line up at the top and should match one of the cogs on the screw.
Next comes the little washer and then the numbered dial.
When replacing the tension assembly on the machine you will need the ring that goes between the tension assembly and the machine. It has a serrated notch where a pin from the tension assembly fits
I marked the set screw scar so that I could re- align it. You can see that I have had the assembly out a couple of times during this process today. New set screw scars.
Subscribe to:
Posts (Atom)