Showing posts with label treadle. Show all posts

Saturday, October 29, 2016

Measure Twice

cut Once.

For years my sewing surface was a cobbled together collection of sewing machine stands.  These were the ones that I might need someday.  One is a Kenmore stand that fits my all time favorite Kenmore: (click to see her photo)  Lila .

The other came with a 404.  I had removed the machine and parked it at the Quilt Zoo, in hopes that someone, needing a machine, would use it and fall in love.  IT WORKED!!  So when the buyers told me they wanted a stand, I said HOORAY, and happily removed it from my loft into their truck.

 I am not lacking for sewing machine stands.  So when a nice lady from Vermont called me and asked if I had any sewing machine stands, specifically a Queen Anne or a Model 44, I said COME GET IT!
She has a 201 and was looking for a stand for it.  She would cruise Craig's List looking for machines with stands,  thinking that she would buy the machine, use the stand and ditch the machine.  Just the opposite of what I used to do.  Perfect match. 

The Queen Anne was in the living room holding a lamp and a photo and one of my Red Heads.   I needed to replace it, so I moved Lila's stand from the loft to the living room.  


That night, at dinner:  "Honey, do you remember how you promised you would make a new table top for my treadle stand?"

"Yes, I do."

"Do you think now would be a good time to  make good on that promise?"


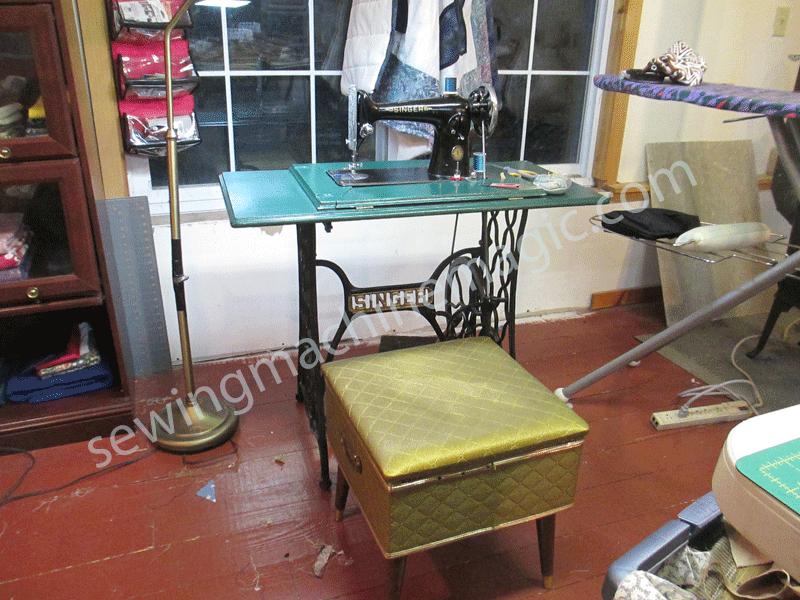
Turns out, he agreed.  I wasted no time in designing the top.  I wanted plenty of space to my left to support the large quilts as I pieced rows together, added borders and binding.  I also wanted space to support the fabric as it passed under the needle.  We decided on a 48 inch square with a cutout for seating.


By now all that was left in the loft was the treadle stand itself.  When Steven asked how big to make the cut out, I merely measured the length of the treadle stand.  

I decided to live with it.
I positioned a school cabinet underneath the left side of the top.  We trimmed the feet just 3/4 of an inchso it would slide right under it.  I moved all four drawers to the left side of the cabinet and Steven added two more to the right. 

I love it.

The only problem is that I have to use the Necchi hinges because Singer hinges don't fit the Necchi.  I am in love with this Necchi.

But not to worry, thanks to Betty, who sent a link to the McKenna Linn's site, we drilled out the holes in the Necchi and now I can switch out machines at will.  Oh and Steven decided that yesterday would be a good time to add an extra piece to the top to correct my measurement error.


I finished the quilt so I have time to sand and paint this repair before its time to attach binding.  If you notice, that is a Singer 15-90 in the stand.  I like this machine.  It is noisier than the Necchi; much noisier.  The Necchi dislikes my polyester thread.  My Super Nova is just as fussy. I think it has to do with close tolerances in the machining.  I doubt I will give up this machine in favor of the Necchi, but if I had to choose between the Necchi and this one, well, I'll let you guess.


Sunday, January 18, 2015

A Beautiful Machine

Today I taught my friend L. how to use a treadle sewing machine. I had been wanting to put a treadle in her house since the first time I visited her in her new home.   I could just see a beautiful Singer Red Head there. So last year, at Christmas time,  Betsy and I delivered one.  L. was away.  She had a house guest who let us in.

"What a beautiful machine."  He must have said it a dozen times. 

 We didn't know where she would want it, so we left it in the middle of the downstairs.  Then we left, feeling a little like the gardener who sneaks baskets of zucchini onto the neighbors' porches.  But this was different,  L. knew we were bringing the machine  and she actually wanted it.

 Sine then, every time I would see her at work, I would mention sewing and the machine. I had no idea that she hadn't put the machine in its stand.  No idea.  I just imagined it sitting there, beautifully, in her beautiful home. 

I finally invited myself over and went today.  There was the treadle stand, basically, right where we had left it.

I opened it up. 

"Where's the machine?"  I said, a bit startled. 

"Right here."  Still swaddled in its bed of sheets and towels, like you know who.

"Do you have a rubber band and a screwdriver?"

And I showed her how to put the machine in its stand.  

"Oh, I could have done that."  (Yup, I thought, you can deliver a baby, you can certainly line up a couple of hinge pins in some hinge holes on the back of a sewing machine, for sure.  Plus there were pretty explicit written instructions right there on the machine)

I demonstrated how to treadle and soon she had the rhythm and was stitching away on a practice piece.  I didn't tell her that when I started treading,  I practiced and practiced on paper first before I even put thread in the machine. 

"I like this.  Sometimes the electric machine seems to get away from me."

 She made one pillow case and was working on the second when I left to wash the car (that was an exercise in futility, January thaw)

I may have to invite myself over again. 

Wednesday, June 19, 2013

Treadle On

In honor of the upcoming Central New York TOGA, I have decided to sew only on treadles.  Except for the serger.

I started out today sewing on the 15-91 and when I finished that project, I headed upstairs to get the 201-3 out of its treadle stand and move it out to the sewing loft.

I am used to hauling stuff all by myself.  Steven had been called to an emergency and I figured I could just do it.

The stand is not heavy.  It is the one that I refurbished last year.  It has no drawers so it is relatvely light.  Getting the machine out was no problem  I have a coil spring installed on this machine.   But it didnt really pop right out.  I had to take the hand wheel off.  The belt is 1/4 inch diameter.  I think it is too thick.  I must check to see if there is a smaller diameter coil spring.

Once I got the machine out  I wheeled it to the top of the stairs.  I inched it down each step, one at a time but it is an awkward thing.  The pitman rod popped off of the foot pedal.  But it didn't break.  That was when I thought to myself

"What is a 60 year old woman doing moving a 100 year old treadle stand down a set of stairs?"

I got it down without breaking the pitman and I wheeled it out to the bottom of the sewing loft stairs.

There it sat until Steven got home from his call.  Wilson watched over it.

Treadling is not too hard.  It takes practice and I know I don't have a good, easy rhythm.  But once I tightened the cone bearings and the pitman rod so that it wasn't so clunky, I found it easier to treadle with a consistent "stroke" .  The noise of the coil spring belt is not unpleasant.  When I finish a seam and stop there is a noise that sounds almost bird like.  Chirpy.


I actually like that sewing stool as a sewing chair.  It is just the right height.  I likely will revert to the office chair because it has wheels and I like to be able to easily move it back and forth.  But today I was feeling all vintage.

Monday, March 11, 2013

Singer 201-3 transformed to a treadle

We had a beautiful warm March day today.  The snow that fell mid week has melted, almost completely.  The sap was running and  I half expected to see a robin or two.  Spring was in the air.

After I cleaned up the dog yard (you know what shows up after snow melts, and there was a whole lot of it) I set to work on the Singer 201-3 Centennial that I found when I was in NC in February.

You all know that I love 201s.  Though I am rather sick of them.  The bobbin case is a PITA to remove because the retaining ring is tricky to get out and back in.  For more information on that process go here http://vssmb.blogspot.com/2011/07/how-to-remove-201-bobbin-case.html.   The potted motor on the 201-2s (common around here) almost always needs re-wiring.   A rewarding, though tedious task, IMHO.

This one is a 201-3; external motor.  No need for a motor when treadling.  I ditched it.  But I still had to service the thing. 
This treadle stand is the one that I rescued last summer.  It was in terrible shape.  I see that I must shim up the front piece so that it sits flush with the machine.  More to do.  Later, much later.

The belt is way too tight on this machine.  I ordered the coil spring belt tonight from McMaster Carr.  Once it comes I can set up one treadle stand for many machines.  I tried this machine in each of the four treadle stands that I have.  Each belt was too tight.  Even this one, that usually houses the 237.

Even thought the belts were all too tight, I did manage to stitch with this machine on the treadle out in the shop.   It makes a lovely stitch.  I was hoping to make something tonight but the belt is just too tight.  I could go out to the cold, lonely shop and treadle on the stand out there.  Instead I will sip wine, cuddle with poodles and tell you all about my day.

I took the hand wheel and the face plate off.  Then I took the slide plate off to expose the bobbin and race.

OOOOH LA LA .  CRUD and DUST every where.
I took the bobbin out to discover a piece of thread caught up in the bobbin case and around the hook

I was sure that I would have to take the hook out to get at this, but turns out, my dental pick lifted it right out.  I admit, I was disappointed.  I was up for the challenge.

I took the needle plate off and removed the feed dogs  next. 
Then I removed the retaining clip and the bobbin case. 
Which exposed a boat load of dirt and grime and lint and FUN !!! 
I knew I would need to get the hook out to do a proper job of cleaning. I removed the position bracket to get at the hook.  But the screw would not budge.  So I dropped some Tri Flow onto the screw and applied some heat with the hair dryer.  I put some more oil on and then left it.  I believe in the tincture of time.

While time was doing its thing with the hook screw, I next serviced the gears. The shuttle gears are harder to get to.  I cleaned them all up with a toothbrush and Kerosene the applied the Triflow grease by reaching up and around with the curved syringe.   It isn't exactly precise, but it worked.  That thread was just sitting there.  I still wonder how it got in there behind the gear cups (which are not shown in this photo)
The back gears are easier to access.  I gave them the same cleaning treatment.  After brushing with Kerosene, I applied some vaseline as well which I then wiped off.  Finally I applied a thin strip of Tri Flow grease and turned the handwheel to distribute it. 
See how it gobs up?  I just took that gob and put it on the gears and turned the hand wheel again.


Then I put the gear cups back on and cleaned up the bottom.
By now the hook screw was ready.

Next post, I promise.

Tuesday, July 3, 2012

Treadle Clean up

I had absolutely no intention of getting involved in this project today.  But it was a warm day, low humidity and a perfect day to paint.  I thought that one of the treadle legs was ready for paint.  I was wrong. This treadle is so dirty.  It is going to take HOURS before I can paint it.   This is how this side looked a few weeks ago.
Here it is after some work that day and some more work today.  I scrubbed with a small wire brush and degreaser.  And I rinsed with the hose.  Then I did it some more until, when I scrubbed, the froth was white, not brown...

 Someone had painted it silver.  It is pretty clear that whoever did that just got out the spray can and went to town, right over the dirt.  The silver paint comes right off along with the dirt.  But there is just so much of it.  

I  wanted to start on the wheel today but I was worried about the pitman.  It's wood.  Hard wood, most assuredly, but wood still and 104 year old wood at that.  I did not want to get it wet.  I did not want to break it .  I wanted to get it off.

I went to Treadle On and looked up how to take apart the treadle base http://www.treadleon.net/sewingmachineshop/treadles/servicingtreadles.html and felt confident that I could do it.  They stated that it is not necessary to remove the pitman.  True, but in this case it had to come off.

Removing the dress guard was easy.  I was surprised and encouraged.  Perhaps removing that screw to the wheel would be easy.  NOT!

I had treated it with PB Blaster before dinner.  I whacked, scraped, applied more PB Blaster, whacked some more, scraped some more, put the hair dryer to it,  applied more PB Blaster and just could not get it loose.  I was about to give up but finally tried Kroil.  (I have a very little bit left over from class)
I grabbed the nut behind the screw and turned it.  It moved, finally.  Then I was able to loosen the screw and back off the cone bearings and finally get the wheel off.  WHEW.


In order to get the pitman off, though, I had to loosen its "adjuster" and remove it. See how I backed that screw all the way out?
Once that was out, the two little pieces in that hole were free to come out.
The little half moon top piece practically fell out, along with a washer that sits between the two pieces.
I had to manipulate the other part.  I think that I can get it back in after everything is cleaned up.

I have already lost the nuts and bolts and some other parts to this machine.  I would not say that they are lost.  I would say they are mis-placed.  They will surface, probably when I clean the shop.
But I did not want to lose this very important and special piece. So I tacked it to the wall and took a picture of it.  It needs cleaning too..
I cleaned the pitman.  I used my utility knife to gently scrape the crud and old paint off.  Then I wiped it down with mineral spirits.
The patent mark is still legible.  Imagine that
I guess this little project was worth it.  None of my other treadles have a wooden pitman.  None of my other treadles are in such terrible shape, either.

Speaking of which, yesterday Steven and I drove over to Gilbertsville to look at a treadle.  It was in worse shape than this one.  It, too, has a wooden pitman.   I offered less than the asking price.  The asking price is firm.

My plan for tomorrow is to try to finish the cleaning.  I think that it will be a breeze now that the pitman is free.....Oh, yeah, I gotta find those parts....(UPDATE, I found them this morning, Independence Day,.......just had to know where to look)


Monday, May 14, 2012

Japanese zz continued

The Japanese zz really had issues with the tension.  I had a Kenmore parts machine and used its tension assembly.  But first I had to remover the one from this machine.  It was really stuck.  I left the machine out in the sunshine for much of the morning and then put it in the car where it was very warm.  By five oclock last night I was able to get the old tension assembly out and the new one fit perfectly.  I also replaced the bobbin case with one from yet another parts machine. 

Voila.  Very nice stitches.  I think this satin stitch is almost as nice as the one on the 237.  I guess I didn't know how nice they were.